 Save
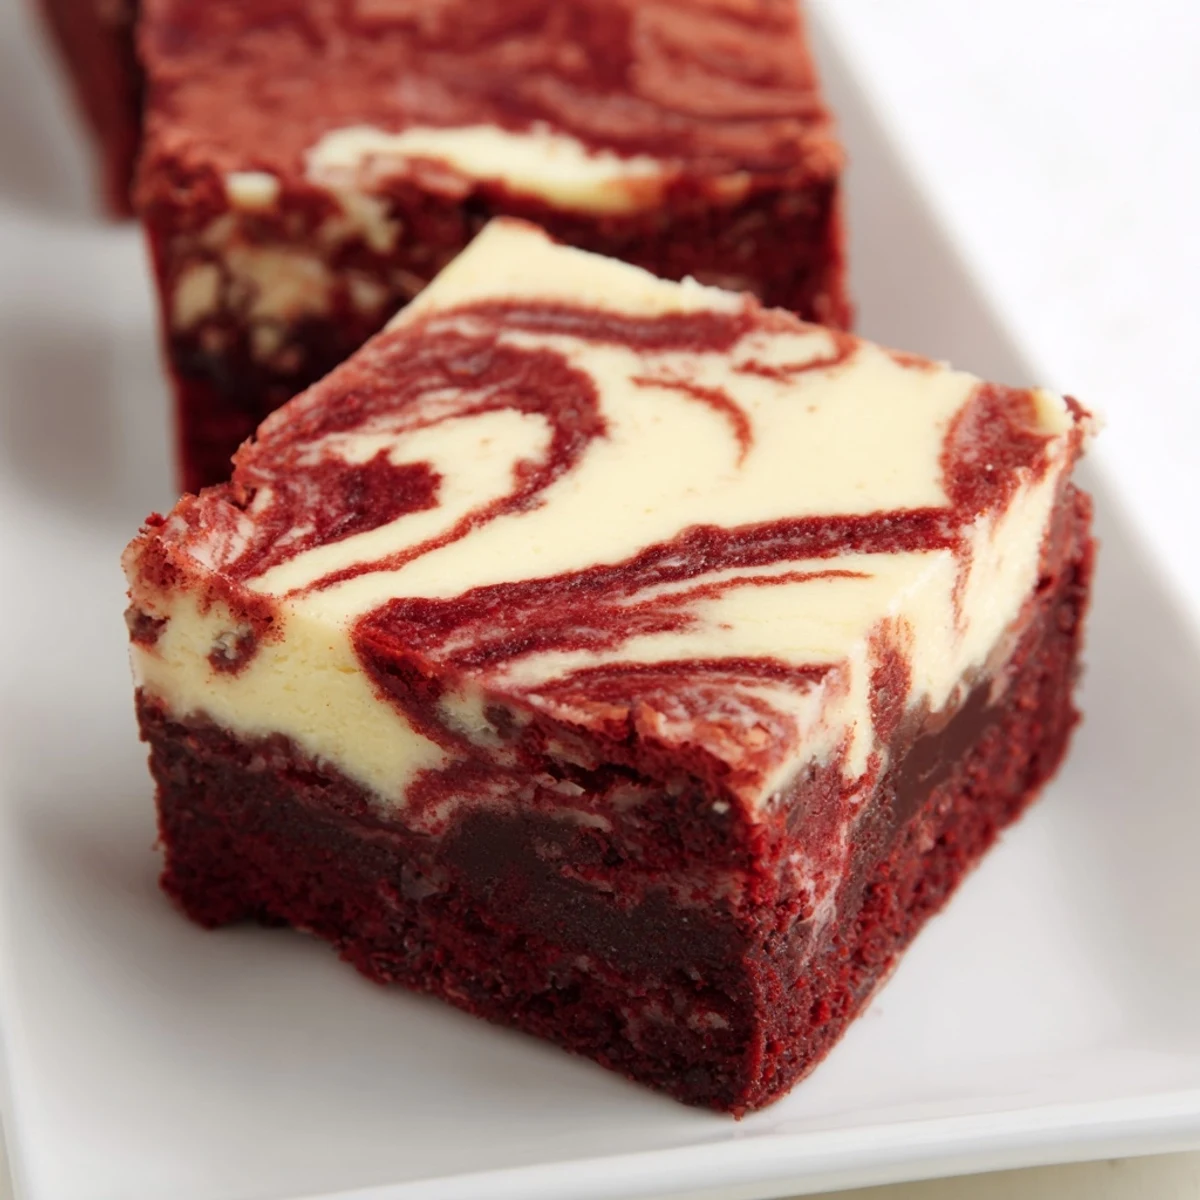
Save These rich red velvet brownies combine a fudgy texture with a smooth cheesecake swirl for an indulgent treat. The batter blends melted butter, sugars, cocoa, and a hint of vinegar to enhance the classic red velvet flavor. Cream cheese mixed with sugar and egg yolk is swirled into the brownie base, creating a marbled effect that delights both the eye and palate. After baking until just set, the brownies cool to a perfect moist consistency, ideal for serving on any special occasion.
The first time I brought these to a dinner party, my friend Sarah literally gasped when she saw the marbled pattern cutting through the deep crimson. She asked for the recipe before even taking a bite, which is basically the highest compliment a dessert can receive.
I originally made these for Valentine's Day, but they've become my go to for practically every occasion. There's something about that red velvet color that makes people feel special before they even take their first bite.
Ingredients
- Unsalted butter: Melt it completely and let it cool slightly before mixing; room temperature ingredients blend together so much better.
- Granulated and brown sugar: The combination gives you that crackly top crust while keeping the interior tender and fudgy.
- Red food coloring: Gel coloring gives you that vibrant restaurant quality red without needing to add excess liquid.
- All purpose flour and cocoa powder: Sift these together to prevent any lumps in your batter; nobody wants a powdery surprise in their brownie.
- Cream cheese: Make sure it's genuinely softened to room temperature; cold cream cheese creates lumpy swirls that won't marble properly.
Instructions
- Preheat and prep your pan:
- Set your oven to 350°F (175°C) and line an 8x8 inch baking pan with parchment paper; leave those edges hanging over the sides like a little sling for easy removal later.
- Mix the brownie batter:
- Whisk together melted butter and both sugars until smooth, then add eggs, red food coloring, vanilla, and vinegar until everything's incorporated.
- Add the dry ingredients:
- Sift flour, cocoa powder, and salt right into the wet mixture and fold gently; overmixing makes tough brownies and nobody wants that.
- Prepare the cheesecake swirl:
- Beat softened cream cheese with sugar, egg yolk, and vanilla until completely smooth; this should take about 2 minutes with a hand mixer.
- Layer and marble:
- Spread most of the brownie batter in your prepared pan, then drop spoonfuls of cheesecake mixture all over the surface; add tiny dollops of your reserved brownie batter on top.
- Create the swirl pattern:
- Run a knife or skewer through both batters in gentle S shapes; don't over swirl or you'll lose those beautiful distinct marbled layers.
- Bake to perfection:
- Bake for 32 to 36 minutes until the center is just set; a toothpick should come out with a few moist crumbs but not wet batter.
- Cool completely:
- Let them cool completely in the pan on a wire rack; trying to slice them while warm will give you messy edges instead of clean squares.
 Save
Save My niece helped me make these last Christmas and insisted on doing the swirling part herself. Her technique was a bit chaotic, but honestly, those imperfect marbled patterns were somehow more beautiful than anything I'd created before.
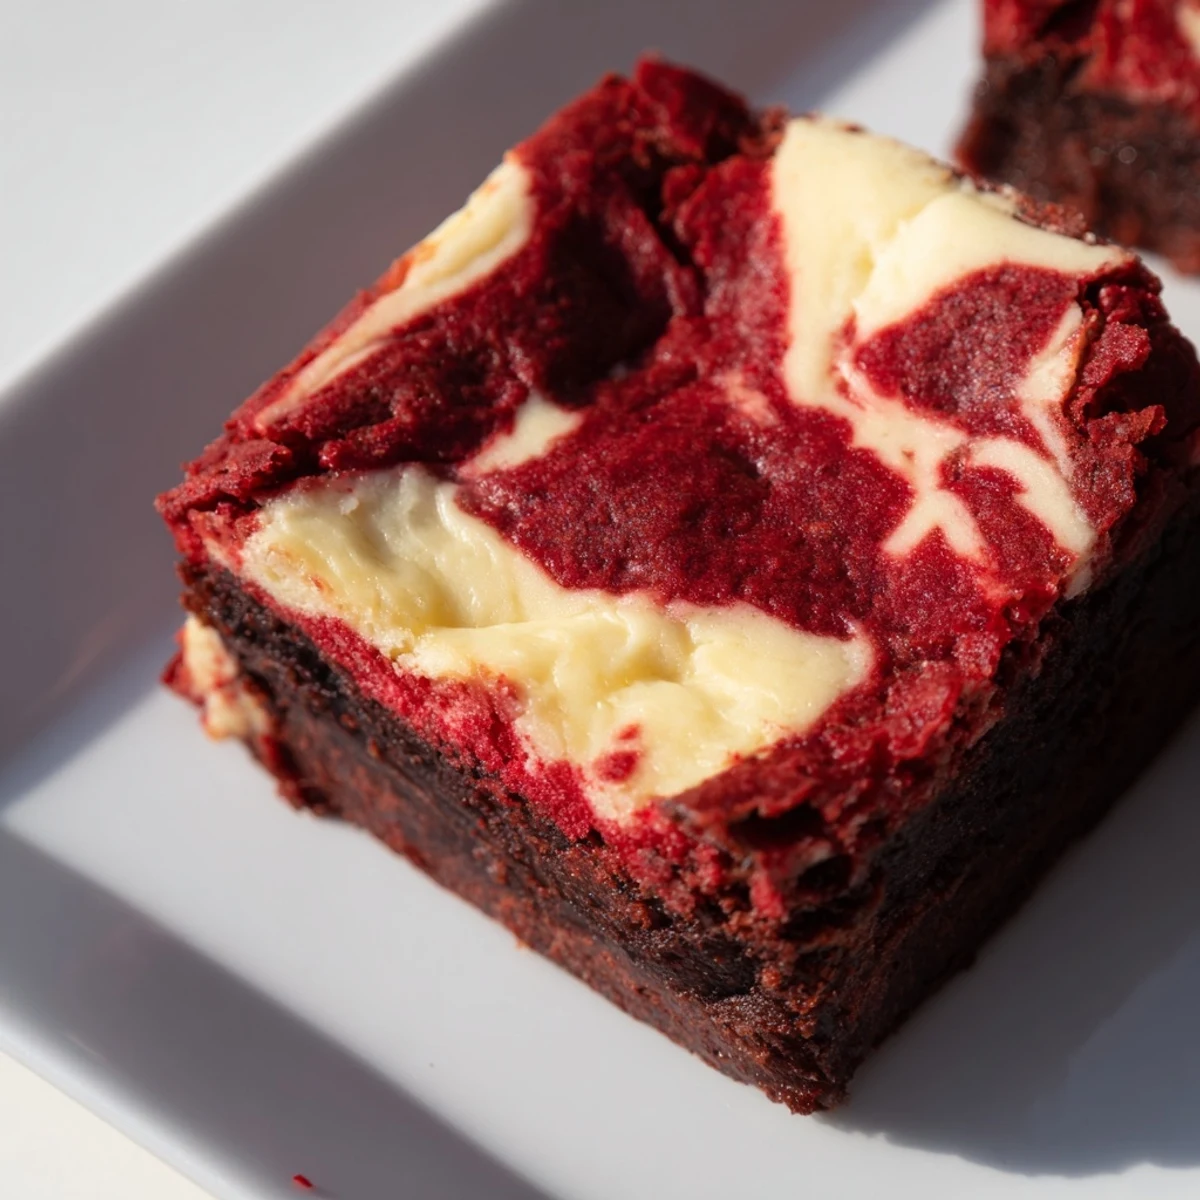
Getting the Perfect Swirl
The key is working with both batters while they're still fresh and slightly thick. If the cheesecake mixture sits too long, it becomes harder to dollop cleanly and won't hold its shape during the marbling process.
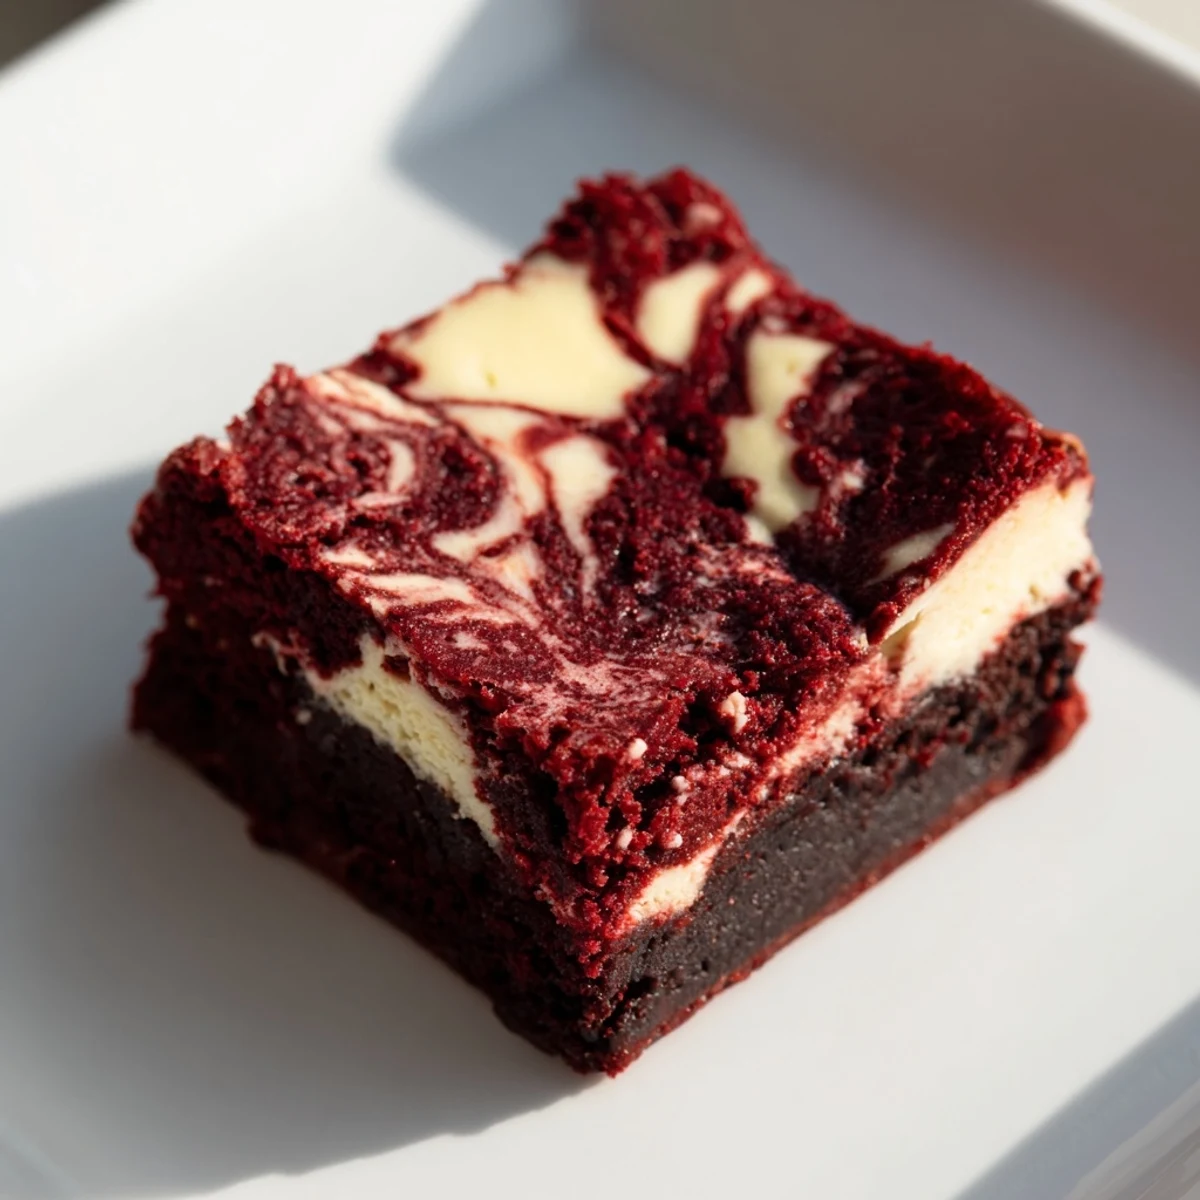
Storage and Serving
These actually taste better the next day after the flavors have had time to meld together. Keep them refrigerated in an airtight container; the cold also firms up that cheesecake layer nicely for cleaner cutting.
Customization Ideas
Sometimes I add a handful of white chocolate chips to the brownie batter for extra pockets of sweetness. You could also swirl in some raspberry jam before marbling if you want a fruity contrast to all that creamy richness.
- Try adding a teaspoon of espresso powder to deepen the chocolate flavor.
- A pinch of cinnamon in the cheesecake layer adds warmth that complements the red velvet perfectly.
- Serve them slightly warmed with a scoop of vanilla ice cream for the ultimate dessert experience.
 Save
Save These brownies have become my secret weapon for potlucks and dinner parties; they're impressive enough to feel special but familiar enough that everyone wants seconds.
Recipe FAQs
- → What gives these brownies their red color?
-
The vibrant red hue comes from red food coloring added to the batter, enhancing the classic red velvet appearance.
- → How is the cheesecake swirl made?
-
The swirl is made by combining cream cheese, sugar, egg yolk, and vanilla, then gently folding it into reserved brownie batter for a marbled finish.
- → What baking pan size should I use?
-
An 8x8-inch (20x20 cm) baking pan is recommended to achieve the ideal thickness and baking time.
- → Can these brownies be stored?
-
Yes, store covered brownies in the refrigerator for up to 5 days to maintain freshness.
- → What texture should I expect after baking?
-
These brownies are fudgy and moist with a creamy, smooth cheesecake swirl that adds richness and texture contrast.
- → Are there any common allergens in these brownies?
-
Yes, they contain dairy (butter, cream cheese), eggs, and wheat gluten.
