 Save
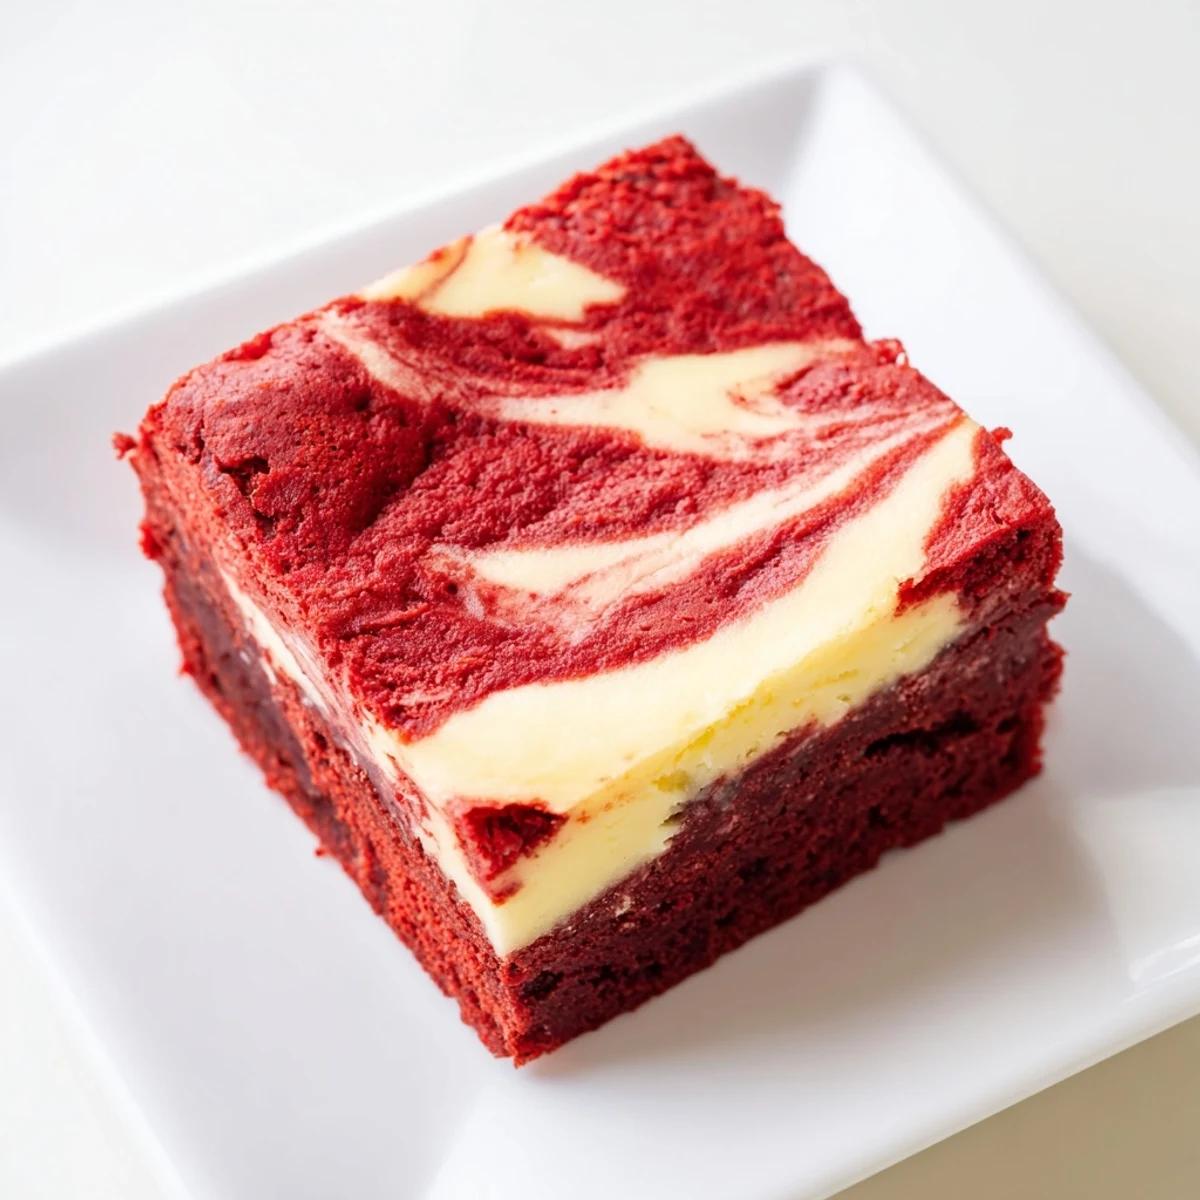
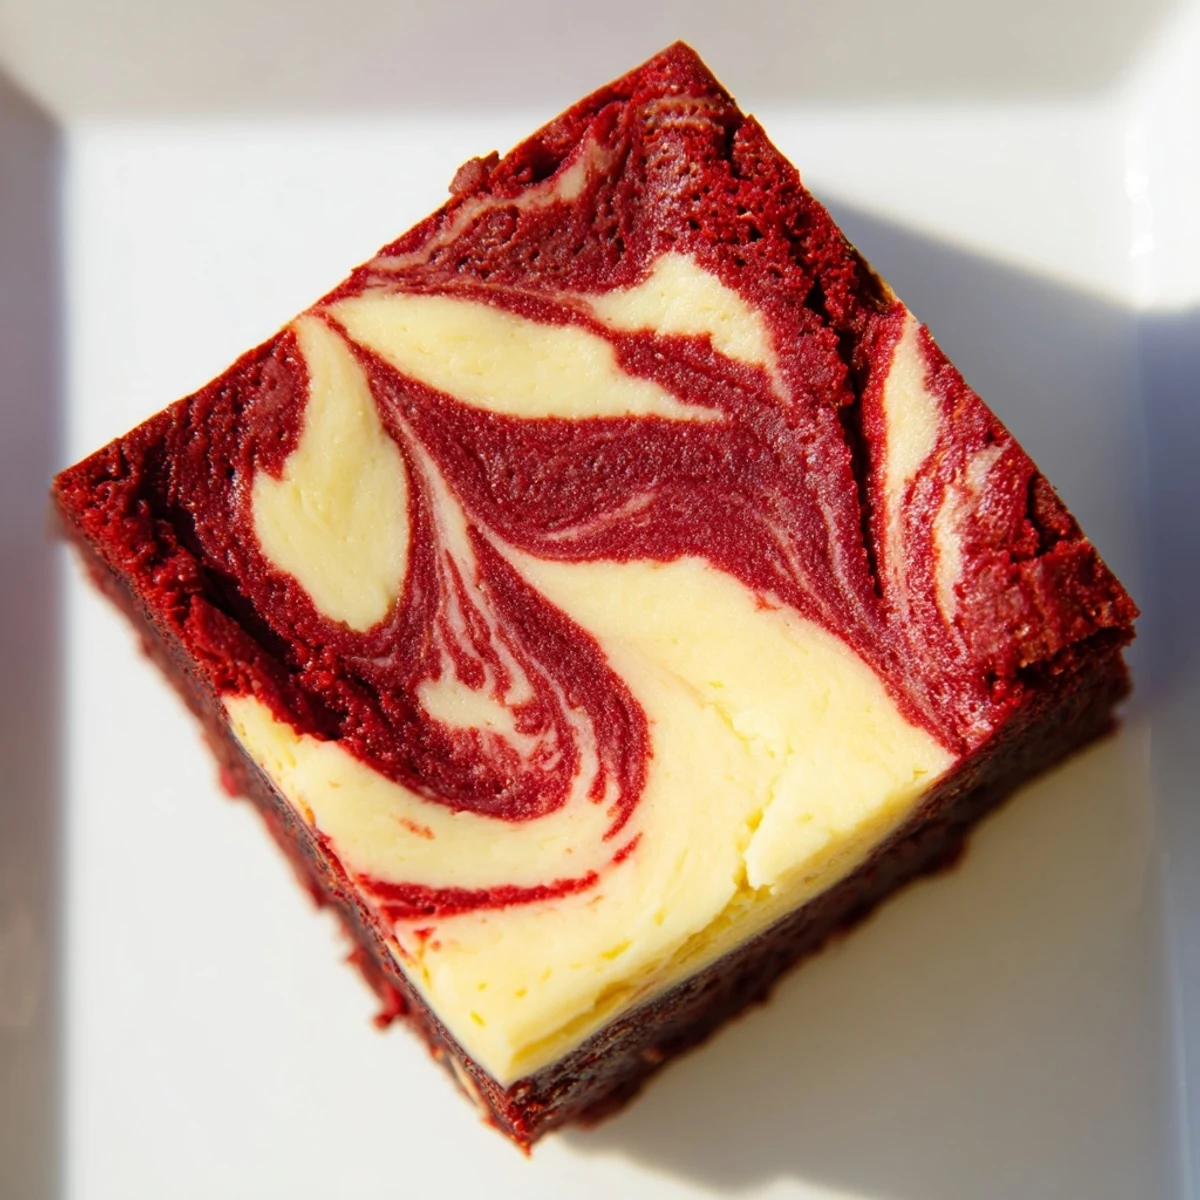
Save These red velvet brownies combine a moist, cocoa-flavored base with a luscious cheesecake swirl that creates a beautiful marbled effect. The batter is gently mixed to keep the texture tender and baked until just set for optimal moisture. The cheesecake topping adds a rich creaminess that balances the subtle chocolate notes and vibrant red hue. Perfectly portioned into squares, this dessert offers a delightful combination of flavors and textures that impress visually and on the palate. Chilling before slicing helps maintain clean edges, and adding mini chocolate chips intensifies the chocolate depth. Serve with fresh berries or a dusting of powdered sugar for an elegant finish.
My sister stumbled into my kitchen last February with a box of red velvet cake mix and a half-empty tub of cream cheese, demanding we bake something that looked fancy but tasted like comfort. We ended up making these brownies instead, and honestly? Theyve been on repeat ever since. Something about that dramatic swirl makes people gasp when you pull them from the pan.
I brought these to a friends birthday potluck last spring and watched three different people ask for the recipe before they even finished their first square. Theres something about red velvet anything that makes people feel celebrated, like theyre getting treated to something special. Now theyre my go-to when I need to show up with dessert but want to keep things low-stress.
Ingredients
- Unsalted butter, melted: I always melt mine in the microwave in 20-second bursts so it doesnt separate or get too hot
- Granulated sugar: Creates that crackly, shiny top on the brownies that everyone loves
- Large eggs: Room temperature eggs incorporate better and prevent the batter from seizing up
- Red food coloring: Gel coloring gives you that vibrant red without adding extra liquid to the batter
- Unsweetened cocoa powder: Dutch-processed cocoa makes for a deeper, smoother chocolate flavor
- All-purpose flour: Dont pack it into your measuring cup or youll end up with cakey brownies
- Cream cheese, softened: Leave it out for at least an hour so it blends into silky smooth perfection
- Egg yolk: Using just the yolk makes the cheesecake layer richer and more stable
Instructions
- Get your oven and pan ready:
- Preheat your oven to 350°F (175°C) and line an 8-inch square pan with parchment paper. Let the paper hang over the edges like handles—youll thank yourself later when lifting the brownies out.
- Make the red velvet batter:
- Whisk melted butter and sugar until theyre smooth and combined. Add eggs, vanilla, and red food coloring, then sift in your cocoa powder, flour, and salt. Fold everything together gently—overmixing makes brownies tough.
- Prep your swirl layers:
- Scoop out 1/4 cup of the red velvet batter and set it aside. Pour the rest into your prepared pan and smooth it into an even layer.
- Whip up the cheesecake swirl:
- Beat softened cream cheese until its completely smooth, then add sugar, egg yolk, and vanilla. Keep mixing until its creamy and no lumps remain.
- Create the marble magic:
- Drop spoonfuls of cheesecake mixture over the brownie base, then add small dollops of your reserved red velvet batter on top. Run a skewer or knife through the layers in a figure-eight pattern without overdoing it.
- Bake to perfection:
- Bake for 33 to 36 minutes until the center is just set. A toothpick should come out with a few moist crumbs but not wet batter.
- Cool completely before slicing:
- Let the brownies cool completely in the pan, then lift them out using the parchment paper handles. Slice into squares with a sharp knife, wiping the blade between cuts for clean edges.
 Save
Save Last Christmas Eve I made three batches of these because my family kept eating them before I could package them for neighbors. Theres something nostalgic about red velvet during the holidays, like carrying forward a baking tradition without all the fuss of a full layer cake. Now my mom calls them the brownies that started appearing everywhere.
Getting That Perfect Swirl
The trick to restaurant-worthy marbling is working quickly once your batters are in the pan. I drop the cheesecake mixture in six evenly spaced dollops, then add smaller red velvet dots between them. One or two figure-eight motions with a butter knife creates beautiful ribbons of color. Less is more here, and every pan comes out looking unique.
Making Them Ahead
These brownies actually taste better the next day after the flavors have had time to meld together. I bake them the night before a party and store them in the refrigerator, then bring them to room temperature before serving. The texture becomes even fudgier, and that cheesecake layer firms up nicely for cleaner slices.
Serving Suggestions
Serve them slightly warmed with a scoop of vanilla ice cream for dessert, or keep them at room temperature for a bake sale treat. I love pairing them with fresh raspberries—the tart fruit cuts through all that richness beautifully. They also make incredible brownie sundaes when crumbled over vanilla frozen yogurt.
- Dust powdered sugar over the top right before serving for extra elegance
- Store them in an airtight container for up to five days at room temperature
- Wrap individual squares in plastic for easy lunchbox treats
 Save
Save These brownies have become my proof that sometimes the most impressive desserts are secretly the simplest. Hope they bring as much joy to your kitchen as they have to mine.
Recipe FAQs
- → What gives the brownies their red color?
-
The vibrant red color comes from the addition of red food coloring mixed into the batter.
- → How is the cheesecake swirl created?
-
A creamy mixture of cream cheese, sugar, egg yolk, and vanilla is spooned onto the brownie batter, then gently swirled with a skewer to create a marbled effect.
- → Can I add chocolate chips to this dessert?
-
Yes, adding mini chocolate chips to the brownie batter enhances the chocolate flavor and adds texture.
- → What is the best way to get clean slices?
-
Chilling the dessert before slicing helps firm up the portions and results in cleaner edges.
- → How long should these be baked?
-
Bake for about 33 to 36 minutes, or until the center is set but still slightly moist for the best texture.
- → Are these suitable for a vegetarian diet?
-
Yes, these brownies contain no meat products and are suitable for vegetarians.
