 Save
Save These mini no bake orange cheesecakes combine a buttery digestive biscuit crust with a luscious cream cheese filling infused with fresh orange zest and juice.
Ready in just 25 minutes of hands-on time, they set in the fridge for 3 hours. Whip cream to stiff peaks, fold into sweetened cream cheese, add bright citrus notes, and spoon over chilled bases.
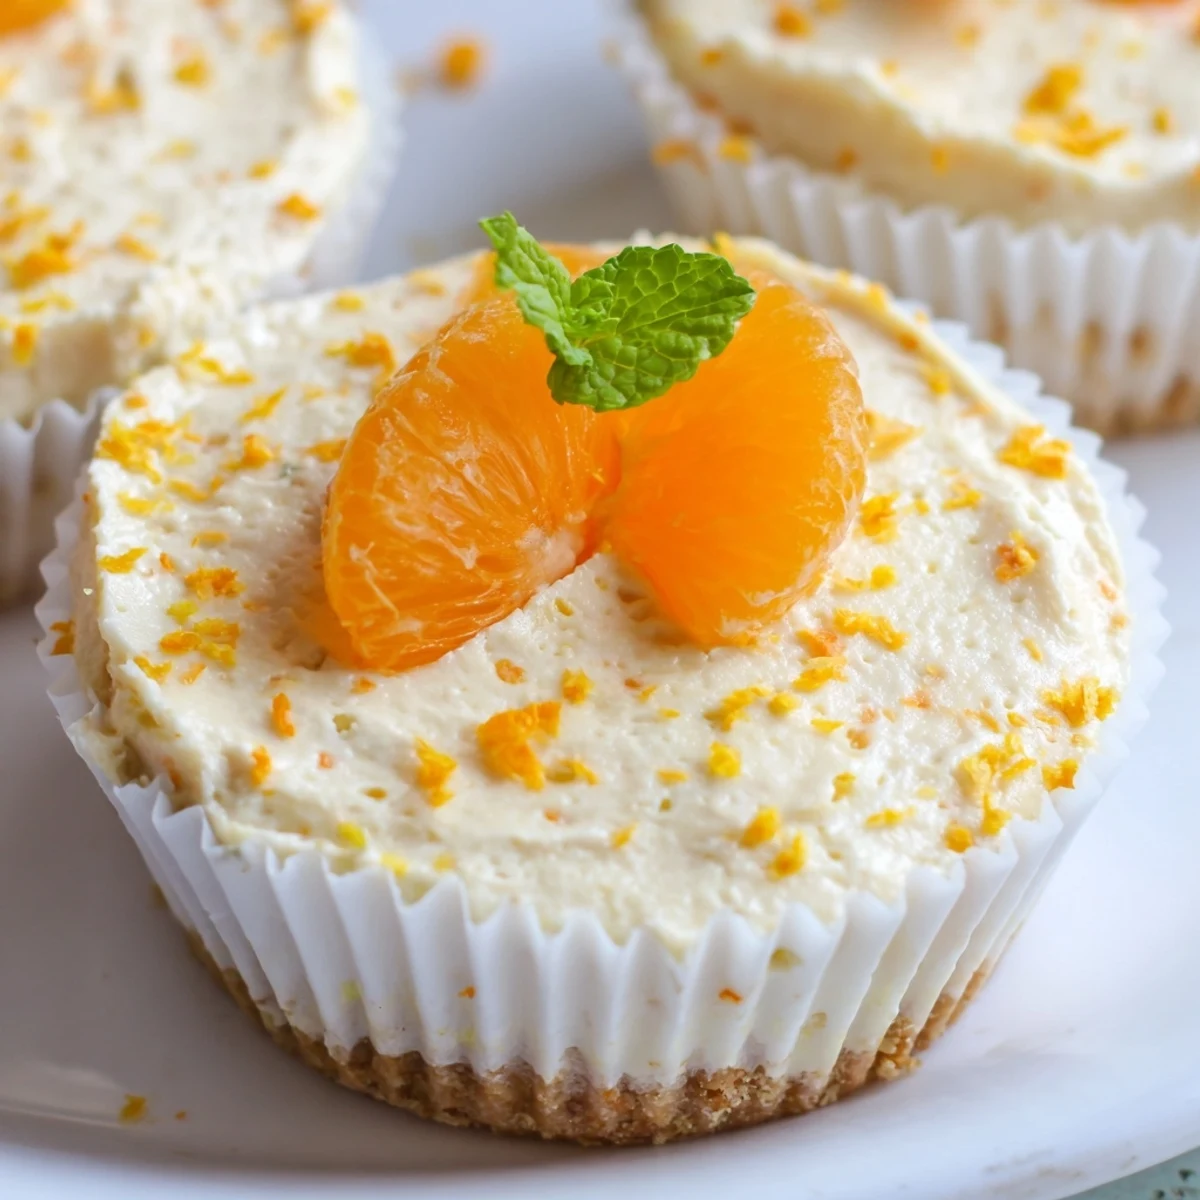
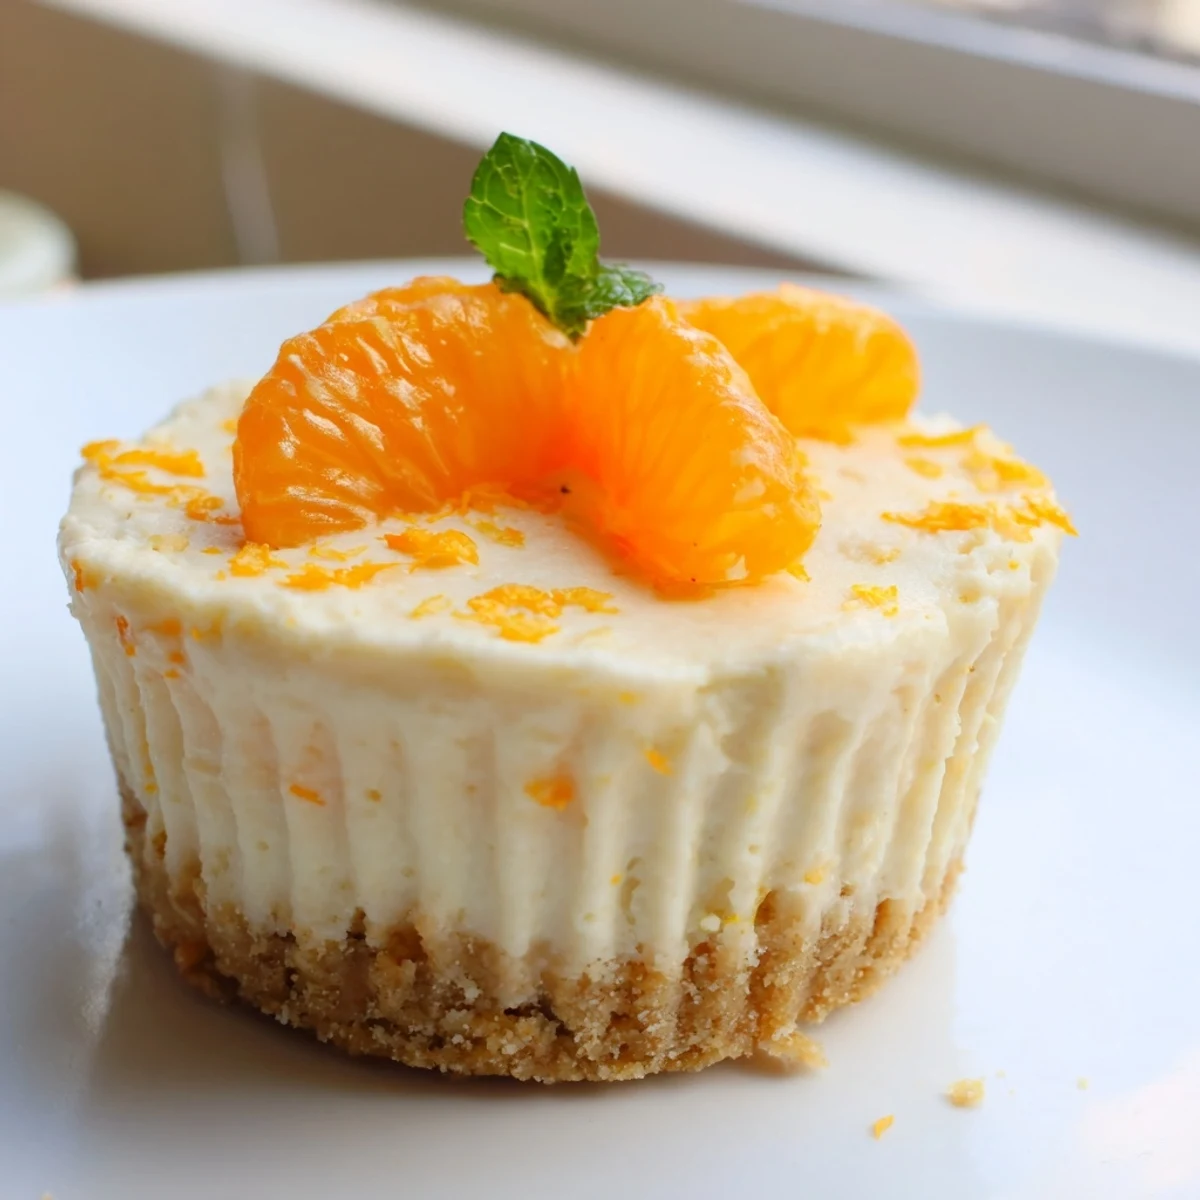
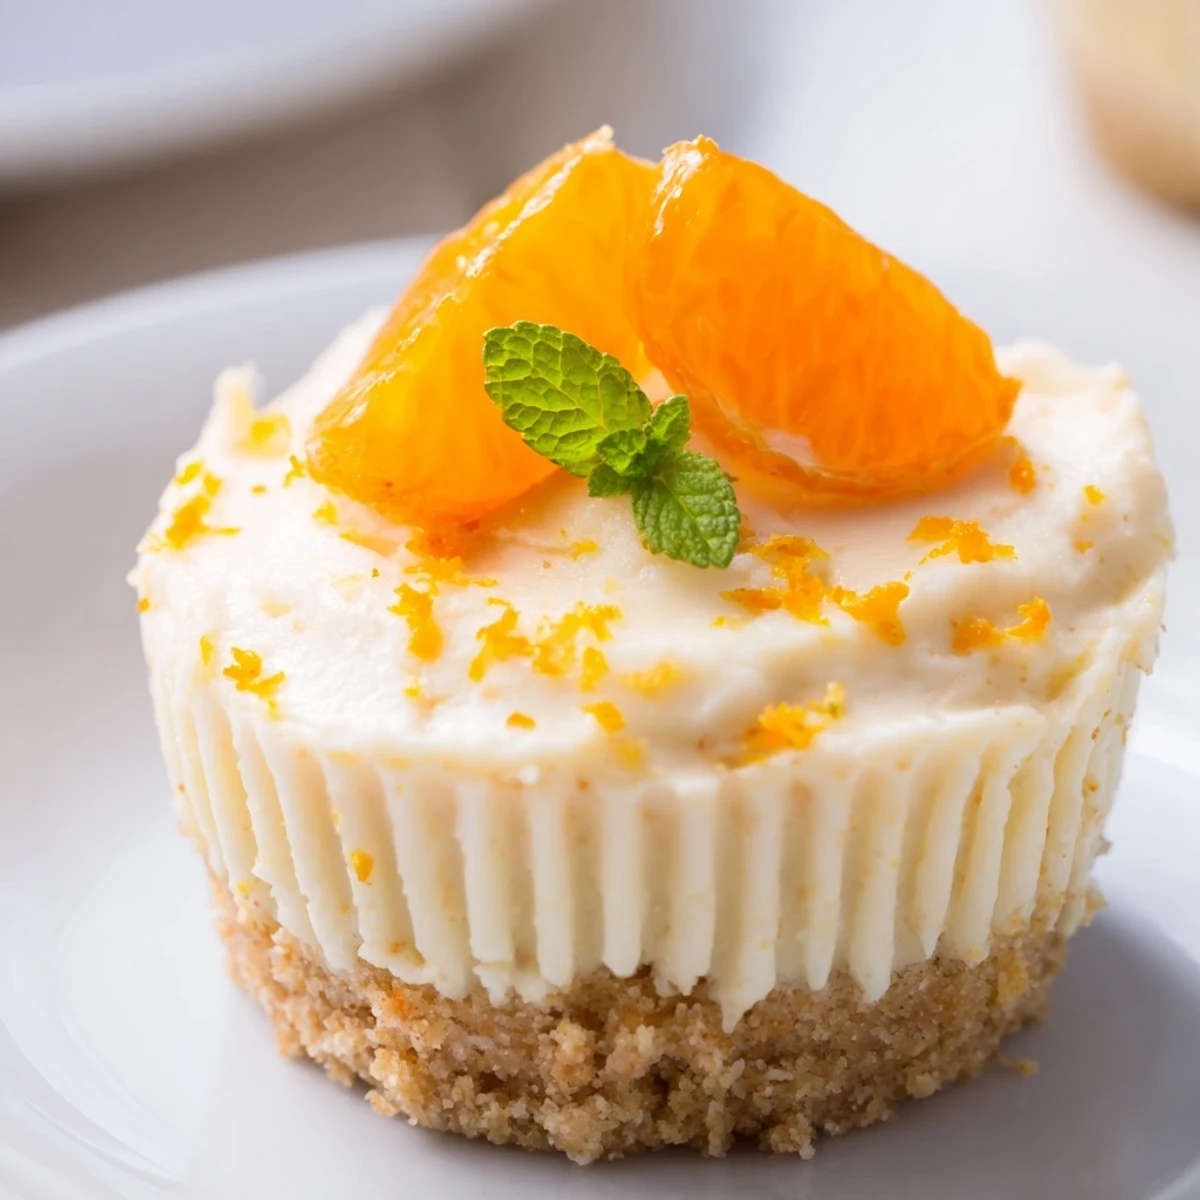
Each serving comes in at 285 calories with 20g of fat. Top with fresh orange segments and mint leaves for an elegant finish that's perfect for warm weather gatherings or effortless entertaining.
The smell of orange zest hitting cream cheese is one of those small kitchen pleasures that stops me in my tracks every single time. These mini no bake orange cheesecakes came together one sweltering July afternoon when turning on the oven felt like a personal attack. Six little cups of sunshine later, I was hooked for good.
I brought a batch of these to a rooftop potluck last summer and watched three people silently reach for seconds within ten minutes. One friend texted me the next morning asking if I had any leftover, which I absolutely did not.
Ingredients
- 120 g digestive biscuits or graham crackers: The crust needs a sturdy, slightly sweet biscuit that holds together when pressed.
- 55 g unsalted butter, melted: This binds the crumbs into a cohesive base that sets firmly in the fridge.
- 250 g cream cheese, room temperature: Cold cream cheese will leave you with stubborn lumps, so let it sit out for at least thirty minutes.
- 60 g powdered sugar: Powdered sugar dissolves seamlessly into the filling without any grainy texture.
- 120 ml heavy cream, cold: Whipping cold cream to stiff peaks gives the filling its light, airy structure.
- 2 tsp orange zest from 1 large orange: The oils in fresh zest carry far more fragrance and complexity than juice alone.
- 2 tbsp fresh orange juice: This adds a gentle tang and rounds out the citrus flavor throughout the filling.
- 1 tsp vanilla extract: A warm background note that deepens the orange without competing with it.
- Orange segments, extra zest, and mint leaves for topping: Entirely optional but they turn a simple cheesecake into something striking.
Instructions
- Prep Your Molds:
- Line a standard muffin tin with paper liners or pull out your silicone molds. Either works beautifully, though silicone gives you cleaner edges when you unmold.
- Build the Crust:
- Pulse the biscuits in a food processor until you have fine, even crumbs, then pour in the melted butter and pulse until the mixture feels like wet sand. Divide it among the liners and press down firmly with the back of a spoon or a small glass.
- Chill the Base:
- Slide the tin into the fridge while you make the filling so the butter has time to firm up and hold everything together.
- Make the Filling:
- Beat the cream cheese and powdered sugar together until completely smooth with no visible streaks. In a separate bowl, whip the cold heavy cream to stiff peaks, watching carefully so you do not overwhip it into butter.
- Fold and Flavor:
- Gently fold the whipped cream into the cream cheese mixture with a spatula, then add the orange zest, orange juice, and vanilla. Fold until everything is evenly combined and the filling looks silky.
- Assemble:
- Spoon or pipe the filling over the chilled bases, smoothing the tops with a small offset spatula or the back of a spoon.
- Chill Until Set:
- Refrigerate for at least three hours, though overnight is even better if you can wait that long.
- Decorate and Serve:
- Top with orange segments, a scattering of fresh zest, and a few mint leaves right before serving so everything looks vibrant and fresh.
 Save
Save Somewhere between zesting that orange and smoothing the last little cup, making these started feeling less like preparing dessert and more like wrapping a tiny edible gift for people I care about.
Make It Your Own
A tablespoon of orange liqueur stirred into the filling transforms these from lovely to dinner party worthy with almost no extra effort. For a gluten free version, simply swap in your favorite gluten free cookies and proceed exactly as written.
Storage and Timing
These keep beautifully in the fridge for up to two days, covered tightly with plastic wrap, which makes them a dream for ahead of time entertaining. The crust softens slightly overnight but honestly nobody has ever complained.
Tools That Help
A food processor makes quick work of the crumbs but a rolling pin and a sturdy ziplock bag will get you there too with a bit of satisfying aggression. Beyond that, you just need a couple of mixing bowls, a hand mixer, a zester, and your muffin tin.
- Freeze the mixing bowl and beaters for ten minutes before whipping the cream for even faster peaks.
- A piping bag gives the tops a professional swirl if you are serving these to guests.
- Always taste your orange before zesting since a dull, dry one will let down the whole dessert.
 Save
Save Little jewels of citrus and cream, these mini cheesecakes prove that the most memorable desserts often come from the simplest methods. Make them once and they will become your warm weather staple.
Recipe FAQs
- → Can I make these mini cheesecakes ahead of time?
-
Yes, these mini orange cheesecakes can be prepared up to 2 days in advance. Keep them covered in the fridge until ready to serve. Add the fresh orange segment toppings just before serving to keep them looking vibrant.
- → What can I use instead of digestive biscuits for the crust?
-
Graham crackers work perfectly as a direct substitute. For a gluten-free option, use your favorite gluten-free cookies. You could also try chocolate sandwich cookies for a richer flavor or shortbread for a buttery twist.
- → How do I get clean edges when removing the cheesecakes from the tin?
-
Using paper liners or silicone molds makes removal effortless. If using silicone molds, gently peel them away after chilling. Running a thin knife around the edge of each cheesecake before unmolding also helps achieve clean sides.
- → Can I freeze these no bake orange cheesecakes?
-
They can be frozen for up to 1 month. Wrap each one individually in plastic wrap, then place in an airtight container. Thaw overnight in the fridge before serving. The texture may be slightly different after freezing but still delicious.
- → What's the best way to segment an orange for the topping?
-
Cut off both ends of the orange, then slice away the peel and white pith following the curve of the fruit. Cut between the membranes to release each segment cleanly. This technique, called supreming, gives you beautiful pith-free segments for garnishing.
- → How do I ensure my cheesecake filling is smooth and lump-free?
-
Make sure your cream cheese is fully at room temperature before beating. Beat it with the powdered sugar until completely smooth before folding in the whipped cream. Cold cream cheese will leave lumps that are difficult to remove later.
