 Save
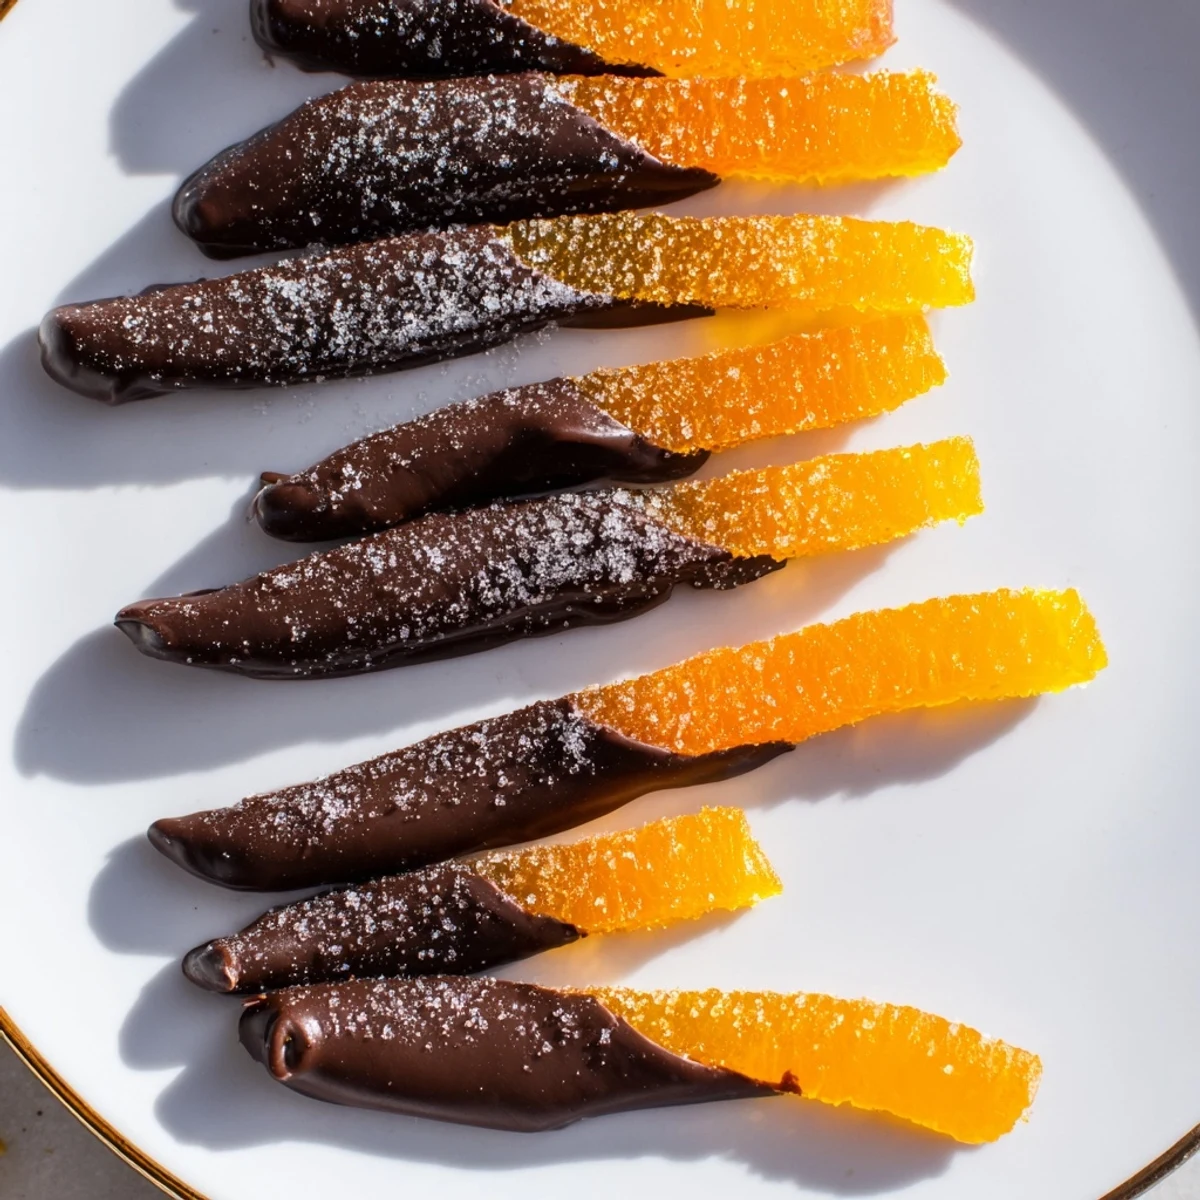
Save These chocolate covered orange peels transform simple citrus into an elegant confection. Fresh orange peels are blanched multiple times to remove bitterness, then slowly simmered in sugar syrup until translucent and tender.
Once dried, each candied strip is dipped halfway into melted dark chocolate and left to set. The result is a beautiful contrast of sweet, tangy citrus and rich, slightly bitter chocolate.
A classic European treat perfect for holiday gifting, dessert boards, or pairing with espresso. They store well in an airtight container for up to two weeks.
The smell of oranges simmering in sugar will haunt you in the best way, sneaking into every corner of your kitchen and making you forget why you ever bought store bought candy. I stumbled into making these chocolate covered orange peels on a rainy Sunday when I had three oranges sitting on the counter and a restless need to do something with my hands. What started as a curious experiment turned into one of those treats that disappears faster than you can say they are for guests only. The bitterness melting into sweetness, the snap of dark chocolate, the way they look piled in a little bowl like something from a Parisian shop window, it is all absurdly satisfying.
I brought a batch of these to a friends dinner party once, tucked into a plain brown bag with a handwritten label, and watched three adults abandon their conversation to crowd around the kitchen counter eating them one after another. Someone asked where I bought them, and that might be the best compliment a homemade treat can get. Since then they have become my go to whenever I want to show up with something that feels special without spending a fortune or losing my mind in the kitchen.
Ingredients
- 3 large oranges (preferably organic): You want unwaxed oranges since you are eating the skin, and organic ones tend to have a more fragrant, oils rich peel that makes all the difference.
- 2 cups granulated sugar: This creates the syrup that transforms bitter peels into something translucent and jewel like, so do not skimp on it.
- 1 cup water: Combined with the sugar to form the candying syrup, just enough to dissolve everything evenly.
- 200 g dark chocolate (60 to 70% cocoa), chopped: The slightly bitter chocolate is essential here because it plays against the sweetness of the candied peel, creating that addictive push and pull.
Instructions
- Prep the oranges:
- Scrub those oranges like you mean it under warm water, then slice off the top and bottom so they sit flat on your board. Score the skin into four sections and peel them off, keeping a thin layer of white pith attached because it adds a pleasant chew.
- Cut into strips:
- Slice each piece of peel into strips about half a centimeter wide, roughly the width of your little fingernail, and try to keep them somewhat even so they cook at the same rate.
- Blanch the bitterness away:
- Drop the strips into a saucepan, cover with cold water, bring to a rolling boil, then drain completely. Do this two more times, and yes it feels tedious, but this is what turns harsh bitterness into something gentle and complex.
- Make the syrup:
- In a clean saucepan, stir the sugar and water over medium heat until every grain dissolves and the liquid looks clear and glossy.
- Candy the peels:
- Slide the blanched peels into the syrup and let them simmer uncovered for 45 to 60 minutes, stirring occasionally so nothing sticks. You will know they are ready when they look translucent and the kitchen smells like a candy factory.
- Dry them out:
- Lift the peels out with tongs and lay them on a wire rack, leaving space between each one so air can circulate. Let them dry at room temperature for at least two hours, though overnight gives you the best texture for dipping.
- Melt the chocolate:
- Set a heatproof bowl over a pot of barely simmering water, not touching the water, and stir the chopped chocolate until it melts into a smooth, glossy pool.
- Dip and finish:
- Take each peel and dip it halfway into the chocolate, letting the excess drip off before placing it on parchment paper. Watch how the shiny chocolate coats the candied peel and try not to eat them before they set.
- Let them set:
- Leave the tray at room temperature until the chocolate hardens completely, or pop them in the fridge for about twenty minutes if you are impatient like me.
 Save
Save There is something quietly wonderful about turning what most people throw away into something beautiful. Every time I peel an orange now, I catch myself thinking about the candy hiding inside that rind.
Getting the Texture Right
The texture of these peels depends entirely on how long you simmer them and how patiently you let them dry. Undercook them and you get chewy, tough strips that fight back when you bite. Overcook them and they turn mushy, falling apart before the chocolate even touches them. That sweet spot right in the middle, tender but with a slight resistance, is what you are chasing.
Choosing the Right Chocolate
I learned the hard way that not all dark chocolate behaves the same way when you melt it. Cheap chocolate with fillers and low cocoa content tends to bloom, leaving those whitish streaks that look unappetizing even though they are harmless. Spend a little more on a bar with at least 60 percent cocoa and simple ingredients, and your peels will have that professional, glossy finish.
Storing and Gifting
These keep beautifully in an airtight container for up to two weeks, though in my experience they rarely last that long. If you are giving them as a gift, layer them between sheets of parchment paper in a pretty tin and try not to eat half the batch during the packing process.
- Keep them away from heat and direct sunlight or the chocolate will soften and stick together.
- A tiny square of parchment between layers prevents any unfortunate clinging incidents.
- Always taste one before gifting to make sure the quality meets your standards, which is just good practice really.
 Save
Save These little strips of chocolate dipped sunshine are proof that the best recipes often come from making something extraordinary out of almost nothing. Keep a batch in your cupboard and watch how quickly they become the thing everyone asks you to bring.
Recipe FAQs
- → Do I need to remove all the white pith from the orange peels?
-
No, leaving a small amount of white pith is actually traditional and adds a pleasant texture. The blanching process (boiling the peels in fresh water three times) removes most of the bitterness from the pith.
- → What type of chocolate works best for dipping?
-
Dark chocolate with 60–70% cocoa content is ideal, as its slight bitterness balances the sweetness of the candied peels beautifully. You can also use milk or white chocolate for a milder, sweeter result.
- → How long do the candied peels need to dry before dipping?
-
Let the blanched and syrup-cooked peels dry on a wire rack for at least 2 hours at room temperature. For best results, dry them overnight. They should feel tacky but not sticky wet before dipping in chocolate.
- → Can I use store-bought candied orange peels instead?
-
While you can dip store-bought candied peels in chocolate, making them from scratch gives you control over sweetness and texture. Homemade peels are more tender and have a fresher, brighter orange flavor.
- → Why do I need to blanch the peels three times?
-
Each blanching round draws out more of the bitter compounds from the pith and peel. Three blanchings is the sweet spot—enough to remove harsh bitterness while preserving the natural orange oils and flavor.
- → How should I store the finished chocolate covered peels?
-
Store them in an airtight container in a cool, dry place for up to 2 weeks. You can also refrigerate them, but bring them to room temperature before serving for the best texture and flavor. Avoid humid environments, as the chocolate may bloom.
