 Save
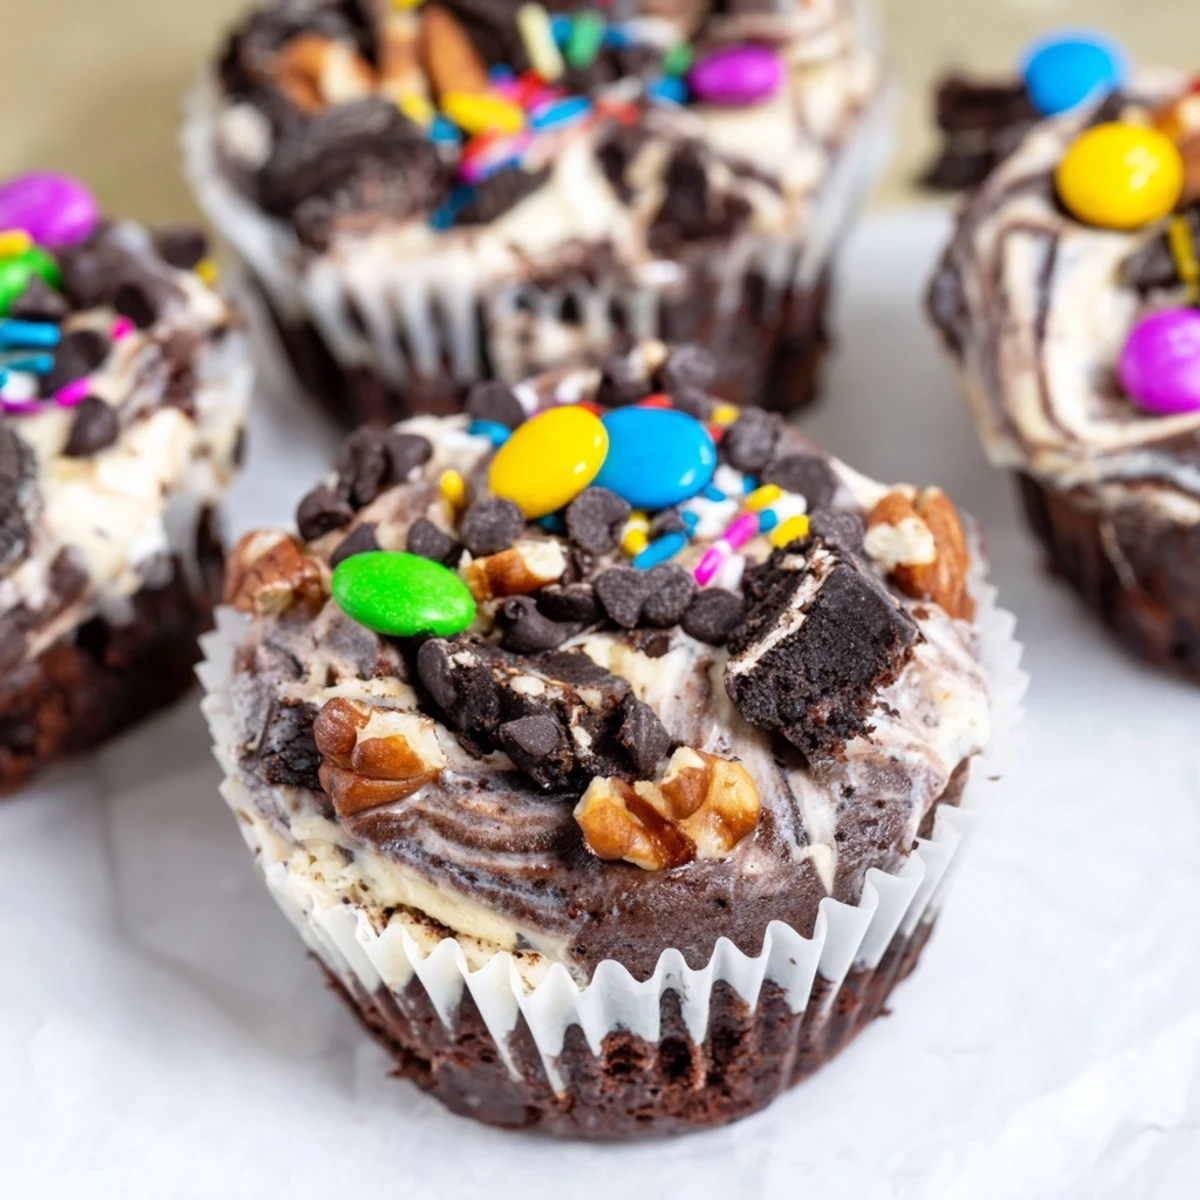
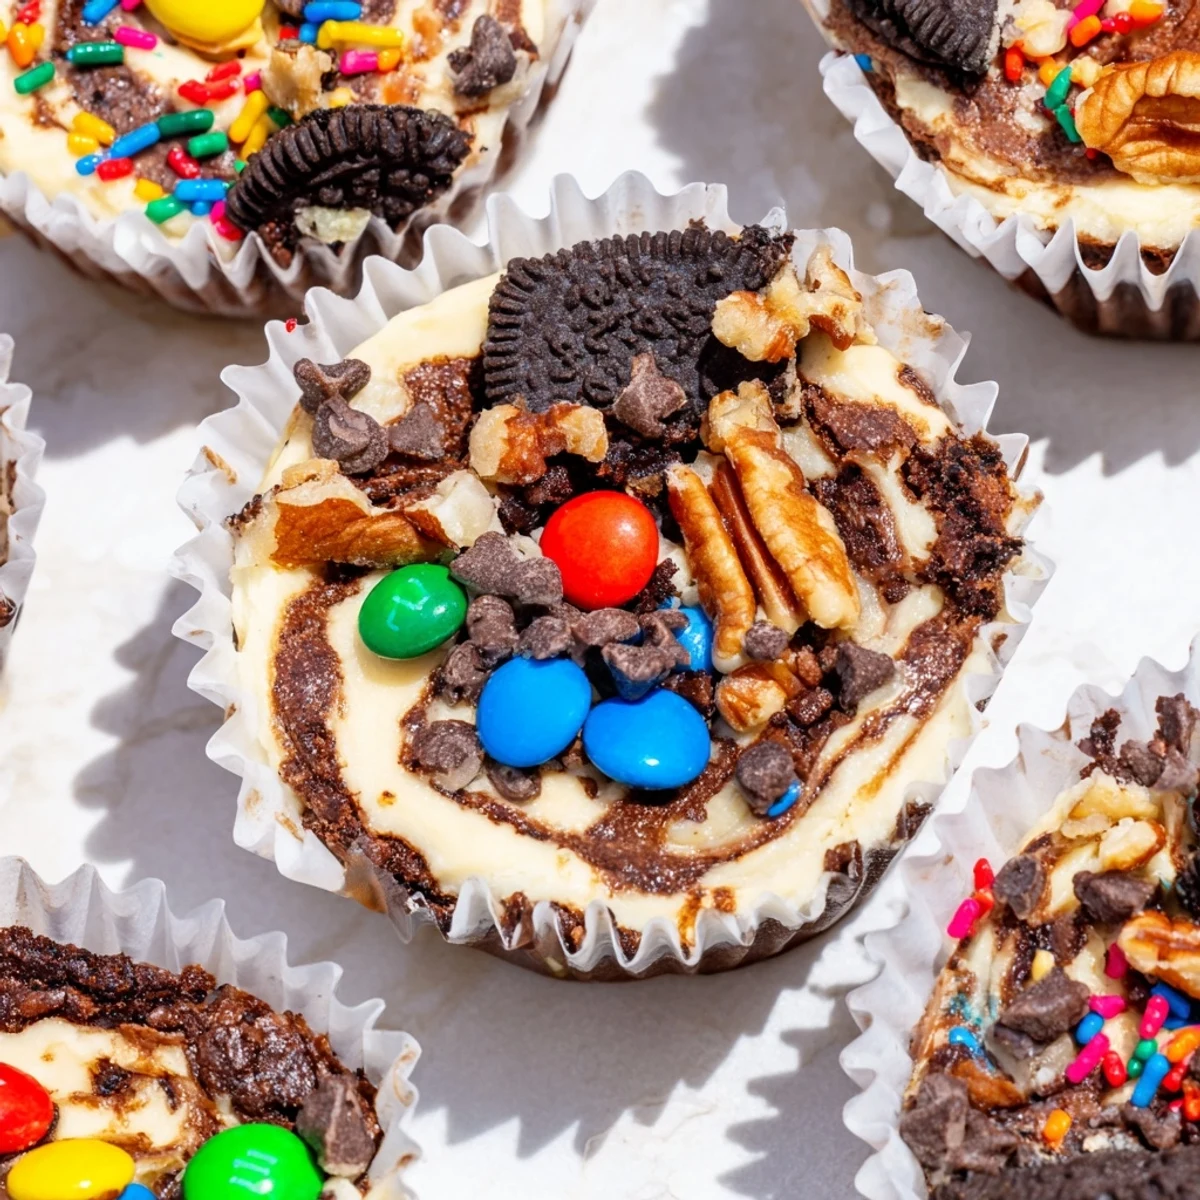
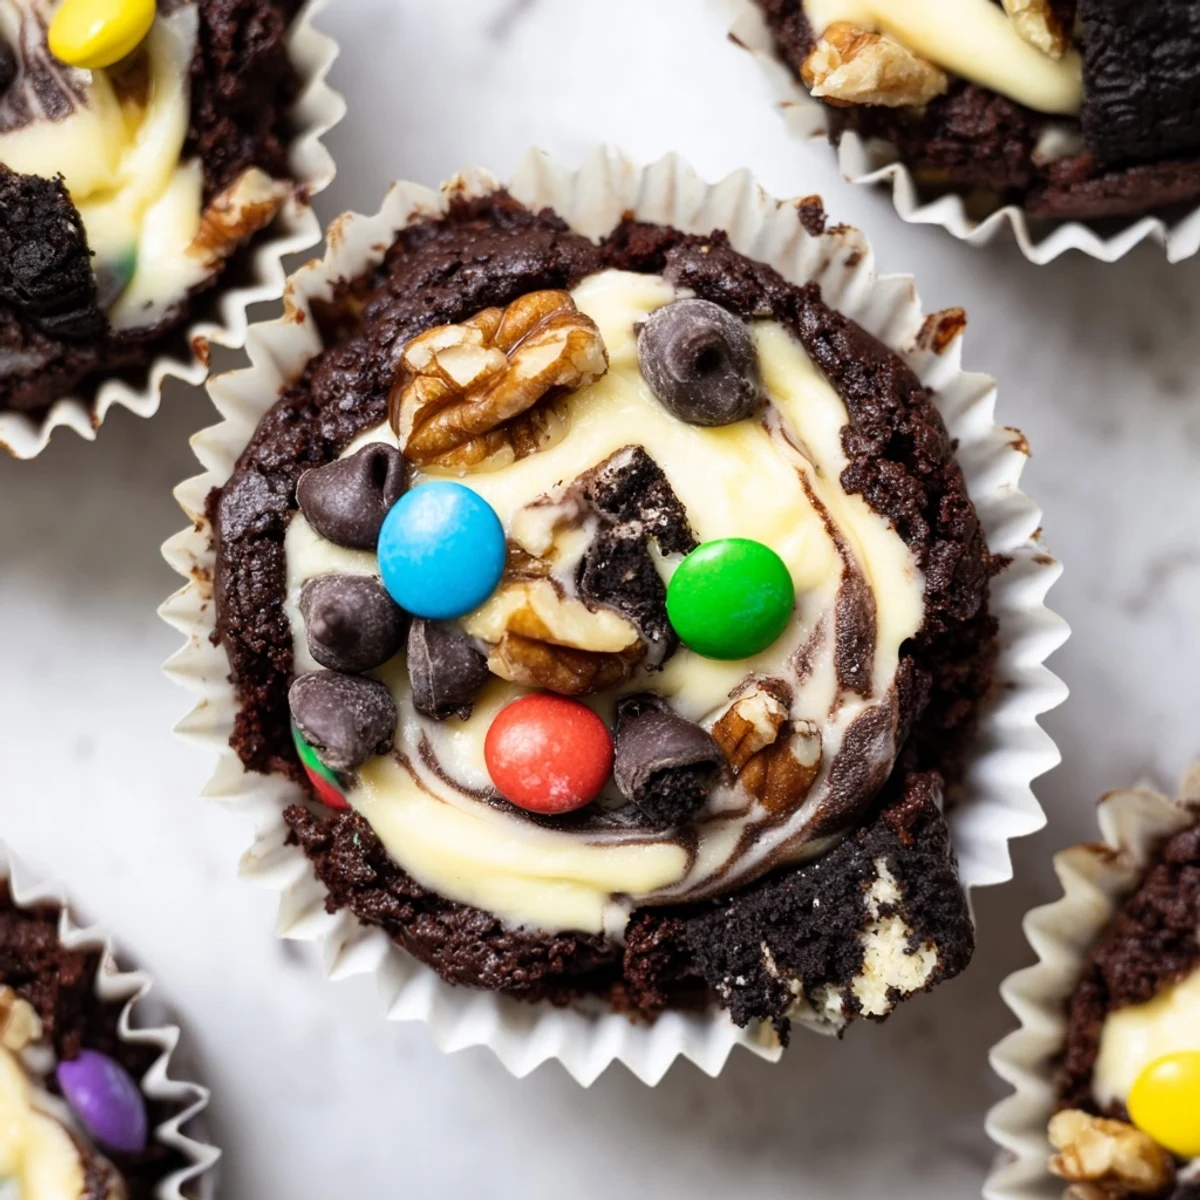
Save These decadent brownie cheesecake cups combine the best of both worlds—a rich, fudgy chocolate brownie base topped with smooth, tangy cheesecake filling. Each cup is generously loaded with mini chocolate chips, crunchy pecans or walnuts, crushed Oreos, and colorful mini M&Ms for maximum texture and flavor.
The assembly comes together in just 50 minutes, with 25 minutes of active preparation. The brownie layer uses melted butter whisked with sugars for that signature glossy, crackly top, while the cheesecake filling beats to silky perfection with cream cheese, vanilla, and a touch of sugar.
After layering the batters in a muffin tin, bake until the cheesecake sets and brownie edges firm up. The secret to perfect texture? Let them cool completely and chill for at least an hour—the cheesecake becomes firm and velvety while the brownie stays fudgy and moist. These portable treats stay fresh in the refrigerator for five days, making them ideal for meal prep or make-ahead party desserts.
The rain was pounding against my kitchen window last February when I decided these brownie cheesecake cups needed to exist. My sister had just texted that she was coming over unexpectedly, and I had half a block of cream cheese and some random baking supplies. Sometimes the best desserts come from that desperate pantry inventory moment.
My roommate walked in midway through prep and immediately started eating the cheesecake filling straight from the bowl. Now every time I make these, she appears in the kitchen like magic, holding a spoon and pretending she just happened to be hungry.
Ingredients
- Unsalted butter: Melt it slowly so you do not accidentally cook the eggs when you add them in
- Granulated and brown sugar: The brown sugar adds moisture and that gorgeous chewy texture
- Large eggs: Room temperature eggs incorporate better and prevent any graininess in your batter
- Vanilla extract: Do not skimp here—real vanilla makes both layers taste professionally made
- Unsweetened cocoa powder: Dutch-process cocoa gives you that deep dark color and intense chocolate flavor
- All-purpose flour: Just enough to hold everything together without turning cakey
- Salt: A half teaspoon might seem small but it balances all that sugar perfectly
- Cream cheese: Let it soften completely or you will end up with tiny lumps in your filling
- Mini chocolate chips: They distribute evenly so every bite has chocolate throughout
- Chopped pecans or walnuts: Toast them for three minutes first if you want next-level flavor
- Crushed Oreos: The cream centers soften slightly in the oven and create these little pockets of sweetness
- Mini M&Ms: They keep their crunch and add this irresistible pop of color
Instructions
- Get your oven ready:
- Preheat to 175°C (350°F) and line your muffin tin with paper liners—I learned the hard way that greasing alone is not enough for these sticky treats.
- Make the brownie base:
- Melt your butter in a medium bowl and whisk in both sugars until the mixture looks glossy and smooth, then beat in the eggs and vanilla until everything is completely combined.
- Add the dry ingredients:
- Sift in the cocoa powder, flour, and salt then stir just until you do not see dry streaks anymore—overmixing makes brownies tough instead of fudgy.
- Layer the foundation:
- Divide the brownie batter among your muffin cups using about one heaping tablespoon per cup, pressing it gently into the bottom of each liner.
- Whip up the cheesecake:
- Beat your softened cream cheese until it is completely smooth then add the sugar, egg, and vanilla, mixing until the filling is creamy and没有任何 lumps.
- Add the creamy layer:
- Spoon about one tablespoon of cheesecake mixture over each brownie base and smooth the tops gently—the layers will stay distinct if you do not swirl them together.
- Load on the toppings:
- Generously sprinkle each cup with whatever combination calls to you—I like doing four of each topping so guests can choose their adventure.
- Bake until just set:
- Bake for 22 to 25 minutes until the cheesecake layer is set and the brownie edges feel firm but the centers still have a slight jiggle.
- Patience is everything:
- Cool them in the pan for 10 minutes before transferring to a wire rack, then chill for at least one hour—the texture is infinitely better cold.
 Save
Save These became my go-to contribution for every potluck after my coworker literally chased me down at an office party to demand the recipe. Now people actually cheer when they see me walk in with that muffin tin.
Mixing and Matching Your Toppings
I have found that peanut butter chips and crushed pretzels create this insane salty-sweet situation that people cannot stop talking about. Coconut flakes work beautifully if you want something that feels a bit more tropical and unexpected.
Making These Ahead of Time
You can bake these up to three days in advance and store them in the refrigerator—the flavors actually develop and get better overnight. Just bring them to room temperature for about 15 minutes before serving so the cheesecake layer softens up again.
Serving Suggestions for Parties
Set up a topping bar and let guests customize their own cups—I put out small bowls with different options and it becomes an activity. People love getting creative and it takes the pressure off you to decide on just one combination.
- Have extra toppings ready because some guests will go wild with the sprinkles
- Cold milk or dark roast coffee cuts through the richness perfectly
- These look absolutely stunning arranged on a wooden board or cake stand
 Save
Save There is something genuinely magical about breaking through that crunchy topping into the creamy cheesecake and hitting the fudgy brownie underneath. These little cups might just become your most requested dessert too.
Recipe FAQs
- → Can I make these brownie cheesecake cups ahead of time?
-
Absolutely! These cups actually improve after chilling. Make them up to 2 days in advance and store refrigerated in an airtight container. The cheesecake layer firms up beautifully, and the brownie stays moist. Bring to room temperature 20 minutes before serving for the best texture.
- → What other toppings work well for loaded cups?
-
Get creative with your mix-ins! Peanut butter or white chocolate chips, toffee bits, shredded coconut, crushed pretzels for saltiness, or fresh berries for contrast. For a s'mores version, use mini marshmallows and crushed graham crackers. The brownie base complements almost any topping combination.
- → How do I know when the cheesecake layer is done baking?
-
The cheesecake is set when the edges are firm and slightly puffed, but the center still has a slight jiggle—like a classic cheesecake. The brownie edges should pull away slightly from the muffin liners. They'll continue firming up during cooling, so don't overbake or the cheesecake may crack.
- → Can I freeze these loaded brownie cups?
-
Yes, they freeze beautifully! Once completely cooled, place cups in a single layer on a baking sheet and freeze until solid (about 2 hours). Transfer to a freezer-safe container with parchment paper between layers. They'll keep for up to 3 months. Thaw overnight in the refrigerator.
- → Why did my cheesecake layer sink in the middle?
-
Slight sinking is normal and actually desirable—it creates a perfect well for holding toppings! However, excessive sinking usually means they're underbaked or the cheesecake mixture was overmixed (incorporating too much air). Next time, beat the cheesecake filling just until combined and ensure they bake the full 22-25 minutes.
- → What's the best way to get clean portions when serving?
-
Chilling is key! These cups slice and serve best when thoroughly refrigerated—at least 4 hours, but overnight is ideal. Use a thin knife to carefully lift from the muffin tin if needed. The cold cheesecake layer becomes firm enough to hold its shape beautifully when removed from the liners.
