 Save
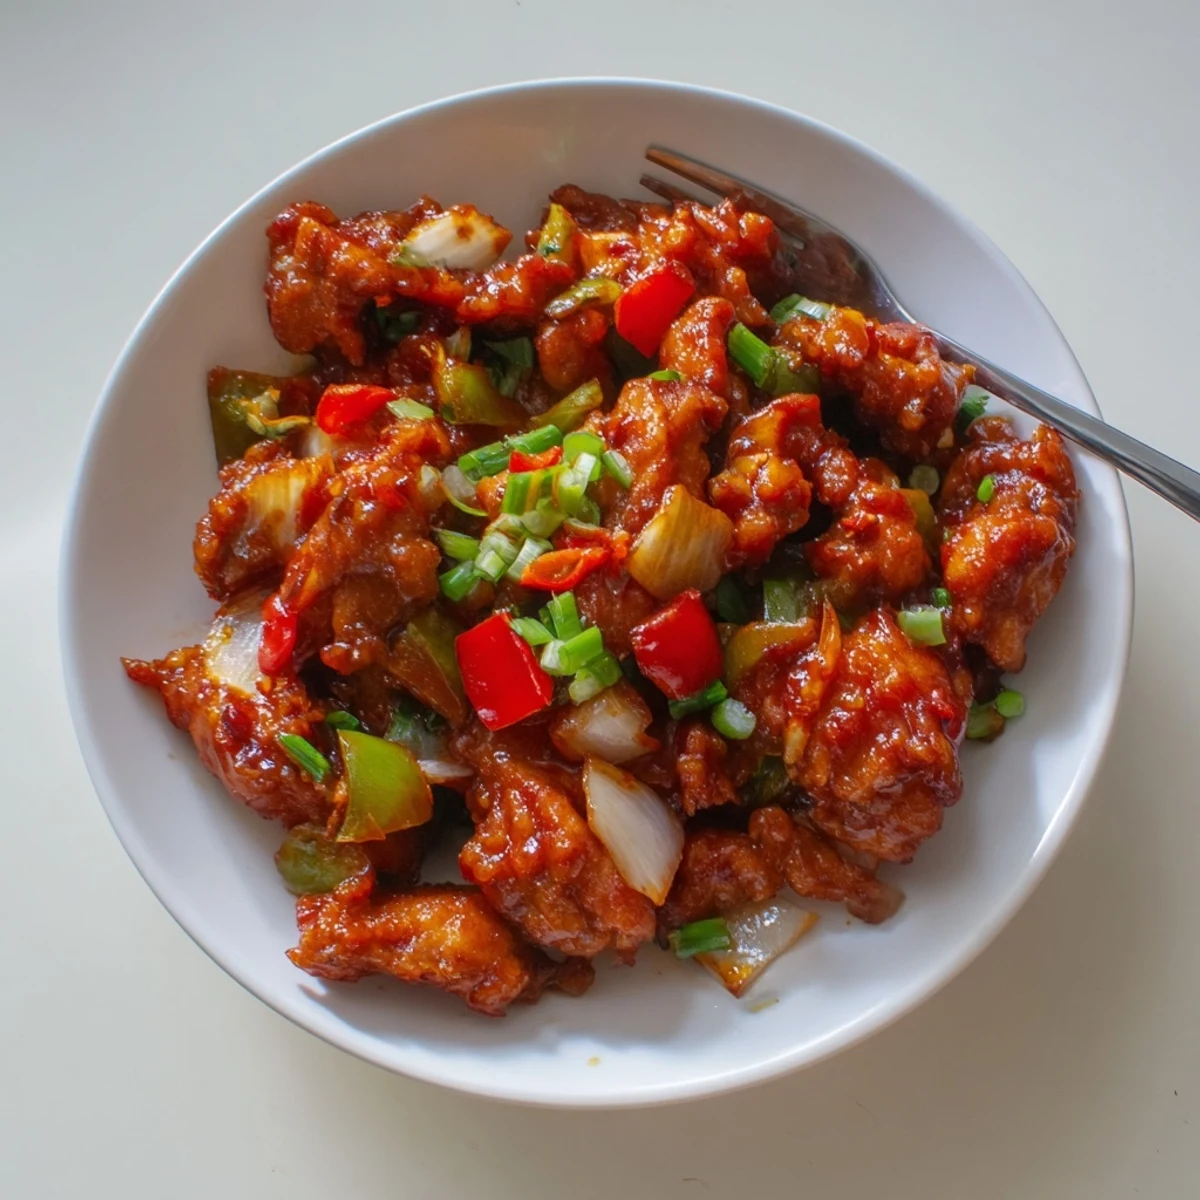
Save This Indo-Chinese chilli chicken begins with bite-sized chicken marinated in soy, vinegar, ginger-garlic and a light coating for a crisp finish. Fry the pieces until golden, then stir-fry garlic, chillies, onions and bell peppers. Add a tangy soy-chilli-ketchup sauce, thicken with a cornstarch slurry to glaze the chicken, garnish with spring onion greens and serve hot with steamed rice or noodles. Serves four in about 45 minutes.
The sizzle of chicken hitting a smoking wok is a sound that instantly pulls me back to a cramped kitchen in college where my roommate Rajesh attempted chilli chicken for the first time and nearly set off every smoke alarm in our building. That chaotic evening taught me something valuable about Indo Chinese cooking: it demands heat, speed, and absolutely zero hesitation. The sauce had splattered across every surface but somehow tasted incredible, and we stood around the stove eating straight from the wok with forks. That dish became our weekend ritual, and I have been chasing that exact balance of tangy heat and crispy coating ever since.
I once made this for a dinner party where three guests claimed they did not eat spicy food, so I nervously dialed back the chillies and worried the whole dish would fall flat. Instead, the gentle warmth let the soy and tomato ketchup sweetness shine through, and those same guests went back for seconds and thirds, completely demolishing the platter before I could even sit down to eat myself.
Ingredients
- 500 g boneless chicken breast or thigh: Thigh meat stays juicier under the fry, but breast works beautifully if that is what you have on hand, just be careful not to overcook it.
- 2 tbsp soy sauce for marinade plus 2 tbsp for sauce: This split usage builds seasoning in layers, one penetrates the chicken and the other drives the sauce forward.
- 1 tbsp rice vinegar or white vinegar: A small splash in the marinade tenderizes the meat and adds that slight tang that makes Indo Chinese food so addictive.
- 1 tbsp ginger garlic paste: This is the backbone of nearly every Indo Chinese dish, so do not skip it or try to substitute with dried powder.
- 2 tbsp cornstarch plus 2 tsp for slurry: One portion crisps the coating and the other thickens the sauce into that glossy glaze that clings to every piece.
- 2 tbsp all-purpose flour: Combined with cornstarch it creates a lighter, shatteringly crisp crust rather than a bready one.
- 1/2 tsp ground black pepper and 1/2 tsp salt: Simple seasonings that wake up the marinade and keep the chicken tasting seasoned through to its center.
- 1 egg: Binds the coating to the chicken and adds richness to the crust during frying.
- 1 tbsp chilli sauce such as Sriracha or Schezwan: Choose your fighter here, Sriracha brings a garlicky warmth while Schezwan sauce turns up the numbing heat.
- 1 tbsp tomato ketchup: This might sound unusual but it provides the slight sweetness and body that balances aggressive heat.
- 1 tbsp oyster sauce optional: Adds a deep savory undertone that rounds out the sauce, leave it out if cooking for vegetarians.
- 1 tsp sugar: Just enough to temper the sharp edges of soy and vinegar without making anything sweet.
- 1 green bell pepper and 1 red bell pepper both diced: Their crunch and color are essential, so keep them slightly undercooked to maintain texture.
- 1 medium onion diced: Provides sweetness and bulk to the stir fry base.
- 4 to 5 spring onions chopped: The whites go into the stir fry and the greens become a fresh finishing garnish.
- 4 to 5 cloves garlic finely chopped: Fresh minced garlic fried in hot oil creates the aromatic foundation of the entire dish.
- 2 to 3 fresh green chillies slit or chopped: Adjust quantity based on your tolerance, and remember you can always add more but never take it back.
- 3 tbsp vegetable oil plus more for frying: Neutral oil is critical here because you need high heat without any competing flavors from the oil itself.
Instructions
- Build the Marinade:
- Toss the chicken pieces with soy sauce, vinegar, ginger garlic paste, cornstarch, flour, black pepper, salt, and the egg in a large bowl, massaging everything with your hands until each piece is completely coated and slightly sticky. Let it rest for at least fifteen minutes while you prep the vegetables and sauce.
- Fry the Chicken:
- Heat about an inch of oil in a deep pan over medium high heat until a test piece sizzles immediately on contact, then fry the chicken in batches for three to five minutes per batch until deeply golden and crisp, transferring each batch to paper towels to drain. Resist the urge to crowd the pan or the temperature will drop and you will end up with soggy coating.
- Start the Aromatics:
- In a large wok or skillet, heat three tablespoons of oil until it shimmers, then toss in the chopped garlic, green chillies, and diced onion, stirring constantly for one to two minutes until your kitchen smells incredible and the onions soften slightly at their edges.
- Add the Peppers:
- Drop in the diced bell peppers and the white parts of the spring onions, stir frying for another two minutes so they pick up some color and char but still hold their bite and crunch.
- Make the Sauce:
- Whisk together the soy sauce, chilli sauce, ketchup, oyster sauce, sugar, and water in a small bowl until uniform, then pour it straight into the wok, stirring well and letting it come to a bubbling simmer that fills the air with a tangy, spicy aroma.
- Coat the Chicken:
- Add all the fried chicken pieces into the simmering sauce, tossing vigorously so every piece gets enveloped in that glossy, dark mixture and begins to absorb the flavors.
- Thicken and Glaze:
- Pour in the cornstarch slurry and stir quickly and continuously as the sauce transforms from loose and watery into a thick, luscious glaze that clings to the chicken and vegetables like lacquer. This happens fast, so keep things moving.
- Finish and Serve:
- Kill the heat, scatter the spring onion greens over the top, and serve immediately while the chicken is still shatteringly crisp and the sauce is at its glossiest, ideally alongside steamed rice or fried rice.
 Save
Save There was a rainy Sunday when my neighbor walked over unannounced just as I was pulling the wok off the heat, and she stood in the doorway sniffing the air with wide eyes before asking what on earth I had made. We ended up sitting on the kitchen floor with plates balanced on our knees, and she told me it reminded her of the street stalls near her childhood home in Kolkata, which might be the finest compliment this dish has ever received.
Choosing the Right Chicken
Thigh meat carries more fat and therefore more flavor, and it forgives you if you accidentally fry it a minute too long. Breast meat works well too but demands vigilance because it dries out quickly once it passes that perfect internal temperature. I usually cut the pieces slightly larger than I think I need, because they shrink a bit during frying and nobody wants bite sized pieces that disappear into the sauce.
Getting the Crispy Coating Right
The ratio of cornstarch to flour matters more than most people realize, and I discovered through many greasy batches that equal parts of each creates the lightest, crispiest shell. The egg acts as the glue holding everything together, but overmixing the marinade makes it gummy rather than airy. Pat the chicken relatively dry before adding it to the marinade, because excess moisture fights against the coating and creates uneven patches.
Serving and Pairing Ideas
This dish shines brightest when served immediately and shared generously with people who appreciate bold flavors without apology. The sauce is thick enough to spoon over plain steamed rice, but it also plays beautifully alongside fried rice, Hakka noodles, or even tucked into a warm flatbread for a chaotic and delicious wrap. Keep these pairings in mind when planning your meal.
- Leftovers reheat surprisingly well in an air fryer set to 190 degrees Celsius for about four minutes, which revives the crunch beautifully.
- A squeeze of fresh lime juice right before serving cuts through the richness and brightens every single flavor on the plate.
- Always garnish with extra spring onion greens because the fresh onion bite against the spicy glaze is what makes this feel like restaurant food.
 Save
Save Cooking chilli chicken at home is one of those small triumphs that makes your kitchen feel like a proper restaurant, and every time you make it the process becomes a little more intuitive and a lot more fun.
Recipe FAQs
- → Can I make this vegetarian?
-
Yes. Swap chicken for paneer or firm tofu, press and cube the substitute, marinate similarly and pan-fry or shallow-fry until golden. Cooking times are shorter for paneer/tofu—watch closely to avoid crumbling.
- → Is baking or air frying a good alternative to deep frying?
-
Both work. Toss marinated pieces in a little oil and bake at high heat or air-fry until crisp. Texture will be slightly less indulgent than deep-frying but still tasty; finish by tossing quickly in the hot sauce to glaze.
- → How do I control the heat level?
-
Adjust green chillies and chilli sauce to taste. Remove seeds from chillies for milder heat, or use milder chilli sauce. Balance spice with a touch more sugar or vinegar in the sauce if it becomes too hot.
- → What can I use instead of cornstarch to thicken the sauce?
-
Arrowroot or tapioca starch can replace cornstarch at the same proportions. Alternatively, reduce the sauce slightly over medium heat to concentrate it, keeping an eye to avoid burning.
- → How do I keep the chicken from going soggy when saucing?
-
Ensure fried pieces are well-drained and extra-crispy before adding to the wok. Add sauce only when vegetables are ready, toss quickly, and add the cornstarch slurry at the end to glaze—this minimizes sogginess.
- → What are the best reheating and storage practices?
-
Store cooled leftovers in an airtight container in the fridge for 2–3 days. Reheat in a skillet over medium heat to revive crispness, adding a splash of water if needed to loosen sauce; avoid long microwave reheats that make the coating soggy.
