 Save
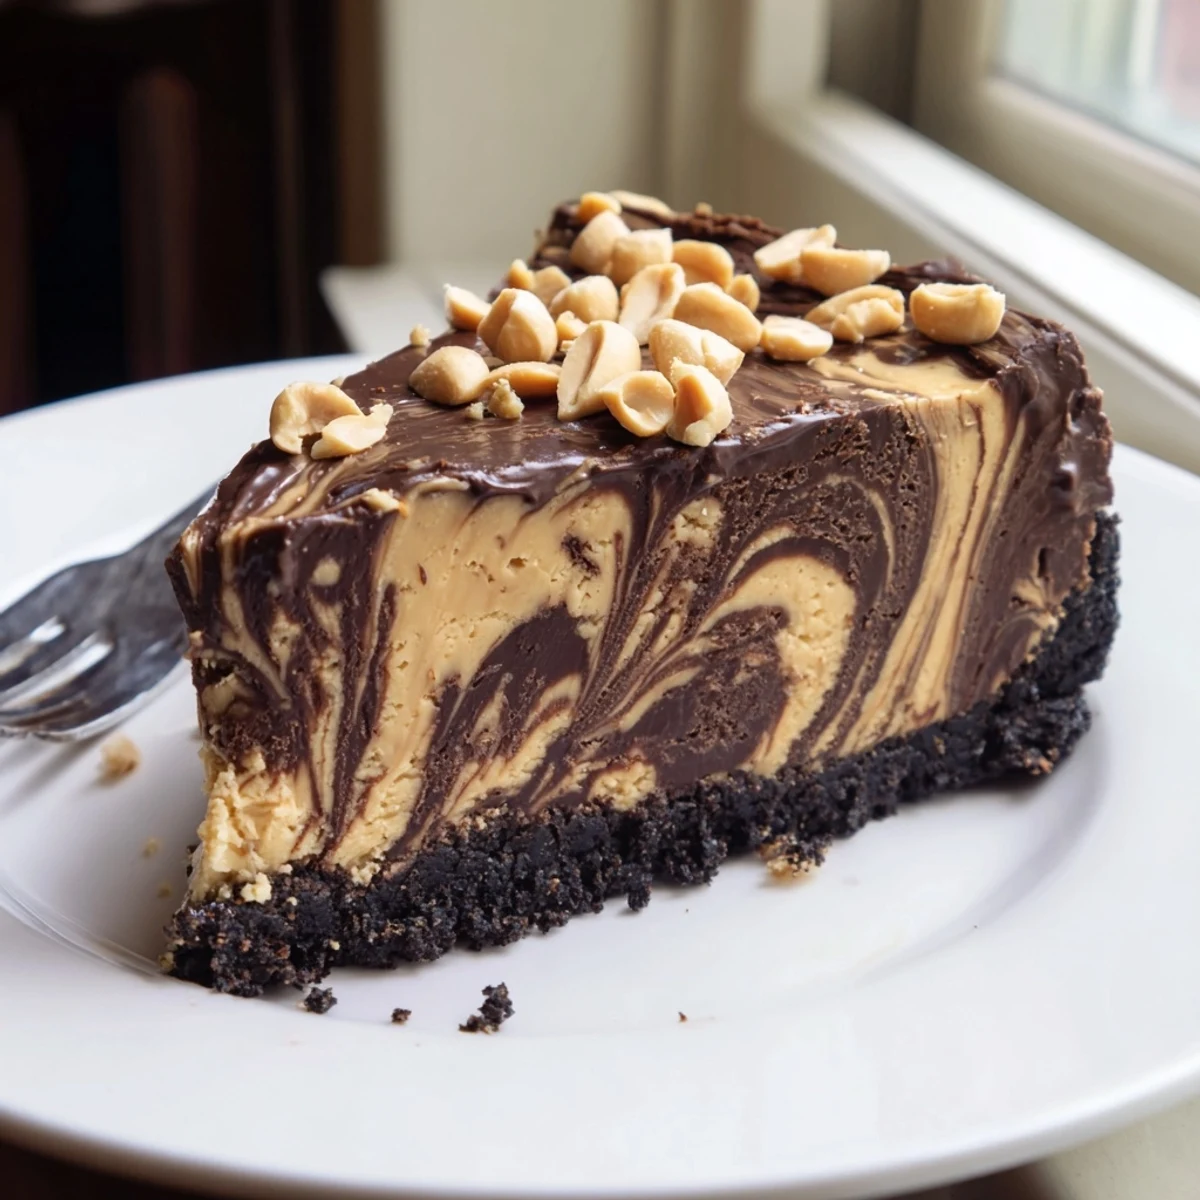
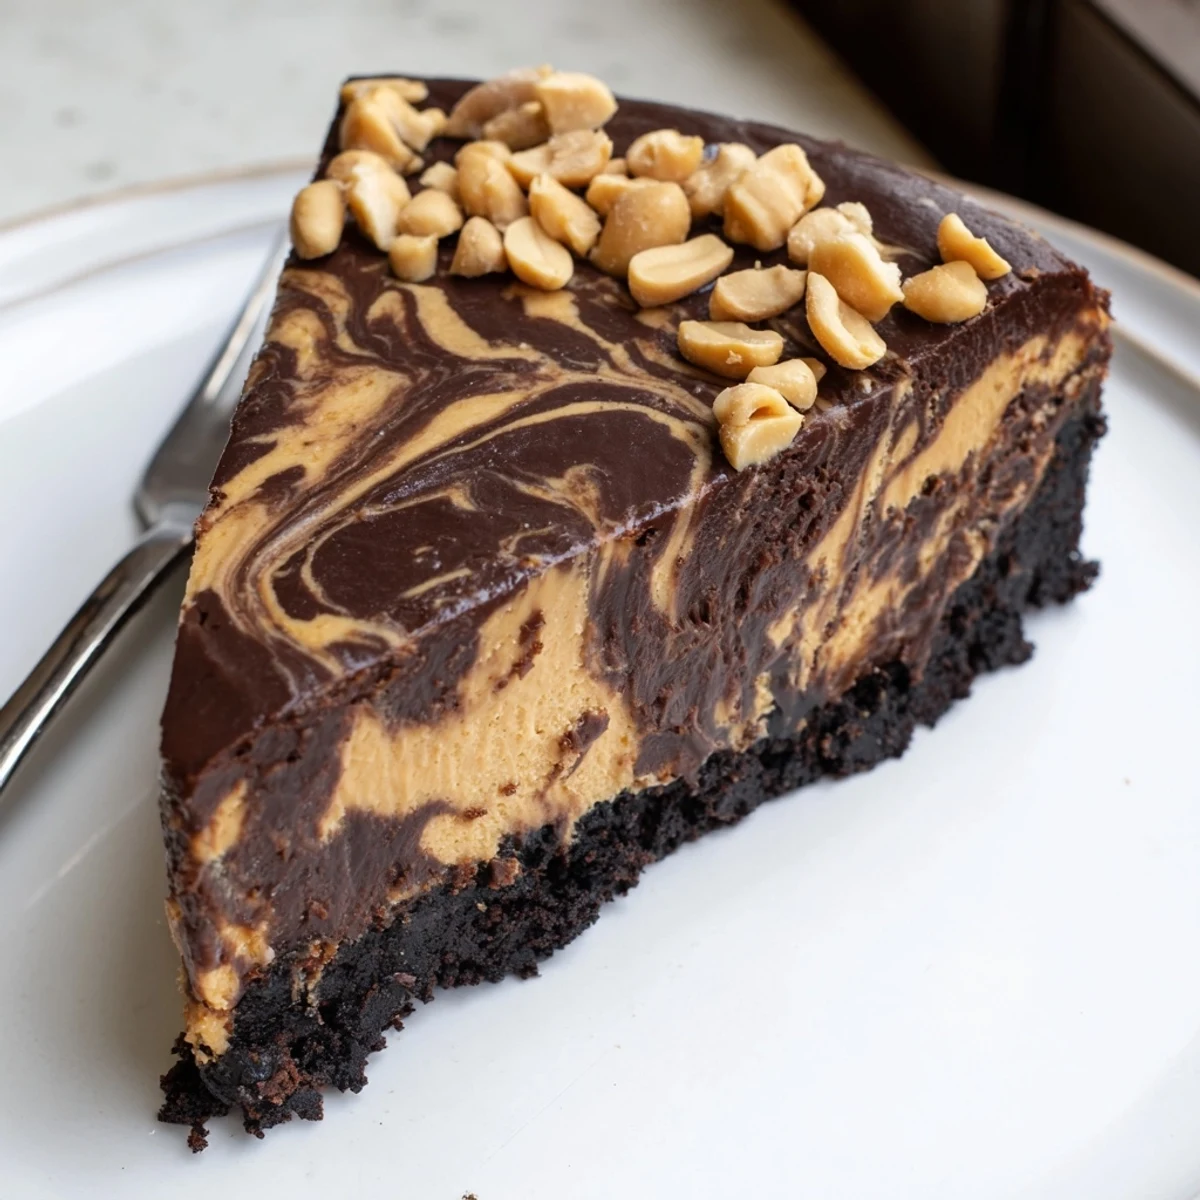
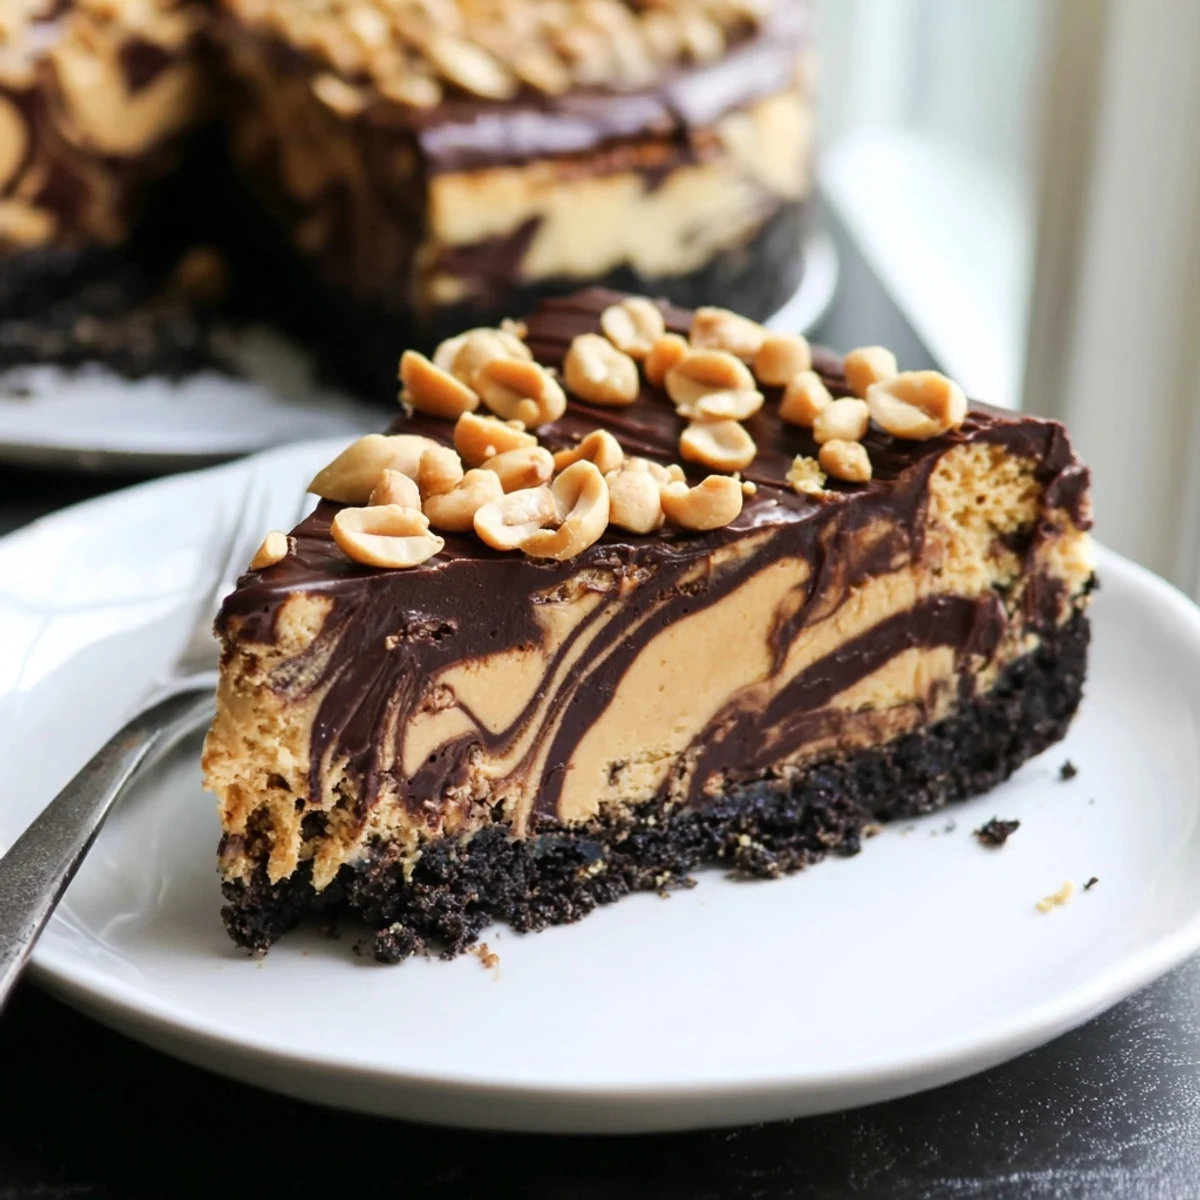
Save This chocolate peanut butter cheesecake brings together two beloved flavors in one showstopping dessert. A buttery chocolate cookie crust serves as the foundation for a rich, swirled filling of cream cheese, peanut butter, and dark chocolate.
The marbled effect is achieved by layering separate chocolate and peanut butter batters and gently swirling them with a knife. After a slow bake and thorough chilling, the cheesecake is finished with a glossy chocolate-peanut butter ganache and optional chopped peanuts for crunch.
Plan ahead — the cheesecake needs at least 4 hours of refrigeration, and overnight is even better for clean slices.
The rain was hammering against the kitchen window the afternoon I got the call that my sister was coming to visit with her new boyfriend. I had four hours and a fridge full of cream cheese, so I panicked and made a cheesecake. It was lopsided, cracked down the middle, and honestly one of the best things I have ever pulled out of an oven.
My brother in law now requests this cake every single birthday, and I have stopped arguing about it. He once ate three slices standing up in the kitchen before anyone else had even sat down at the table. I consider that the highest compliment a home cook can receive.
Ingredients
- Chocolate sandwich cookies (200 g): Crush them finely because big chunks make the crust crumble instead of hold together when you slice.
- Unsalted butter (60 g), melted: This binds the crumbs and a little extra never hurt anyone.
- Cream cheese (600 g), softened: Leave it out for at least two hours because cold cream cheese will give you lumps no amount of beating can fix.
- Smooth peanut butter (200 g): Use the commercial kind, not the natural separating stuff, for the creamiest texture.
- Granulated sugar (200 g): Balances the deep bitterness of the dark chocolate perfectly.
- Large eggs (3): Add them one at a time on low speed to keep the batter silky and avoid incorporating too much air.
- Vanilla extract (1 tsp): A quiet background note that rounds everything out.
- Sour cream (120 ml): This is the secret to a dense, velvety filling that never feels heavy.
- Dark chocolate (100 g for filling plus 120 g for topping), melted: Go for something around seventy percent cacao for real depth.
- Heavy cream (120 ml): Heated until just steaming to make the ganache topping glossy and pourable.
- Creamy peanut butter (2 tbsp, for topping): Stirred into the warm ganache for a finishing layer that ties everything together.
- Chopped roasted peanuts (optional): A handful on top adds a welcome crunch.
Instructions
- Preheat and prepare the pan:
- Set your oven to 160 degrees Celsius (325 degrees Fahrenheit). Grease a 23 cm springform pan and line the bottom with parchment paper so nothing sticks.
- Build the crust:
- Toss the crushed cookies with melted butter until everything feels like damp sand. Press it firmly and evenly into the base of the pan, then bake for ten minutes until it smells like toasted cocoa.
- Start the filling:
- Beat the softened cream cheese and sugar together until completely smooth, scraping the bowl at least once. Add the peanut butter and mix until it disappears into a silky, pale mass.
- Add the eggs and extras:
- Drop in the eggs one at a time on low speed, letting each disappear before the next goes in. Stir in the vanilla and sour cream until just combined.
- Split and flavor the batter:
- Divide the filling evenly between two bowls. Fold the melted chocolate into one half, stirring gently until it turns a gorgeous dark brown.
- Create the marble effect:
- Pour the chocolate batter over the cooled crust and spread it flat. Spoon the peanut butter batter on top in dollops, then drag a knife through both layers in figure eights for that beautiful swirl.
- Bake low and slow:
- Bake for fifty to sixty minutes until the edges are puffed and set but the center still wobbles like gelatin when you gently shake the pan.
- Cool gradually in the oven:
- Turn the oven off, crack the door open, and let the cheesecake sit inside for one full hour. This gentle cooling prevents those ugly cracks across the top.
- Chill thoroughly:
- Transfer the cheesecake to the refrigerator for at least four hours or, ideally, overnight. Patience here is what separates a good cheesecake from a great one.
- Make the ganache topping:
- Heat the cream until it steams, pour it over the chopped chocolate, and stir until the mixture turns glossy and smooth. Swirl in the peanut butter, let it cool slightly, then spread it over the cold cheesecake.
- Finish and serve:
- Scatter chopped peanuts over the top if you want the crunch. Slice with a hot, clean knife for the neatest portions.
 Save
Save One year I brought this to a holiday potluck and watched a quiet corner of the dessert table become the most popular spot in the room. People who swore they were too full for dessert somehow found room. That cheesecake vanished in under twenty minutes.
The Right Pan Makes All the Difference
A springform pan is nonnegotiable here because you need to release the sides without flipping the whole thing onto a plate. Make sure the latch closes firmly because batter leaking onto the oven floor is a smell you will never forget.
Getting That Marble Swirl Just Right
The trick is to not overthink the swirling because random, imperfect patterns look far more beautiful than anything deliberate. Use the tip of a paring knife and move through the batter in broad, lazy curves. Stop after six or seven passes or you will end up with a muddy brown cake instead of a marble one.
Serving and Storing Like a Pro
This cheesecake actually tastes better on day two because the flavors deepen and the texture firms up beautifully overnight. Keep it covered in the refrigerator for up to five days.
- Run your knife under hot water and wipe it dry between every single slice for clean, bakery worthy edges.
- Let slices sit at room temperature for about fifteen minutes before serving so the filling softens into its creamiest state.
- Freeze individual slices wrapped tightly in plastic for up to two months, thawing them overnight in the fridge when the craving hits.
 Save
Save Some recipes become staples because they work every single time and this is absolutely one of them. Make it once and people will ask you for it forever.
Recipe FAQs
- → Can I make this cheesecake ahead of time?
-
Yes, this cheesecake actually benefits from being made a day in advance. The flavors meld and the texture firms up beautifully after an overnight rest in the refrigerator. It will keep well for up to 4 days covered in the fridge.
- → Why does the cheesecake need to cool slowly in the oven?
-
Cooling the cheesecake gradually inside the turned-off oven with the door cracked prevents cracks from forming on the surface. A sudden temperature change causes the filling to contract too quickly, leading to unsightly cracks.
- → Can I use crunchy peanut butter instead of smooth?
-
You can substitute crunchy peanut butter, but the filling will have small bits of peanut throughout, which changes the silky texture. For the smoothest, creamiest result, stick with smooth peanut butter in the filling and save crunchy for garnish if desired.
- → How do I get clean slices when serving?
-
Use a sharp knife dipped in hot water and wiped clean between each cut. The heat melts through the cheesecake cleanly. Chilling the cheesecake overnight and adding the topping just before serving also helps maintain neat portions.
- → Can I freeze this cheesecake?
-
Absolutely. Wrap the cooled cheesecake (without topping) tightly in plastic wrap, then aluminum foil. Freeze for up to 2 months. Thaw overnight in the refrigerator, then add the chocolate-peanut butter topping before serving.
- → What type of dark chocolate works best for the filling and topping?
-
A good-quality dark chocolate with 60–70% cocoa content works best. It provides rich flavor without being overly bitter. Avoid using chocolate chips, as they contain stabilizers that prevent smooth melting.
